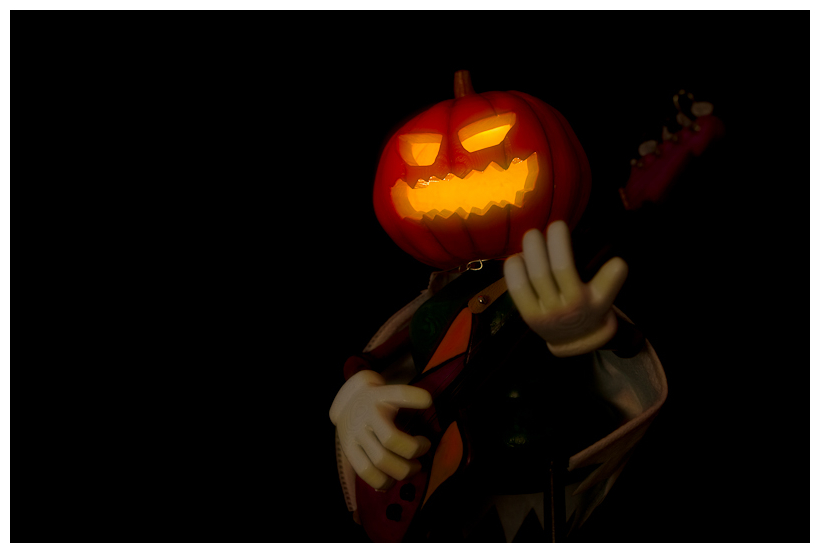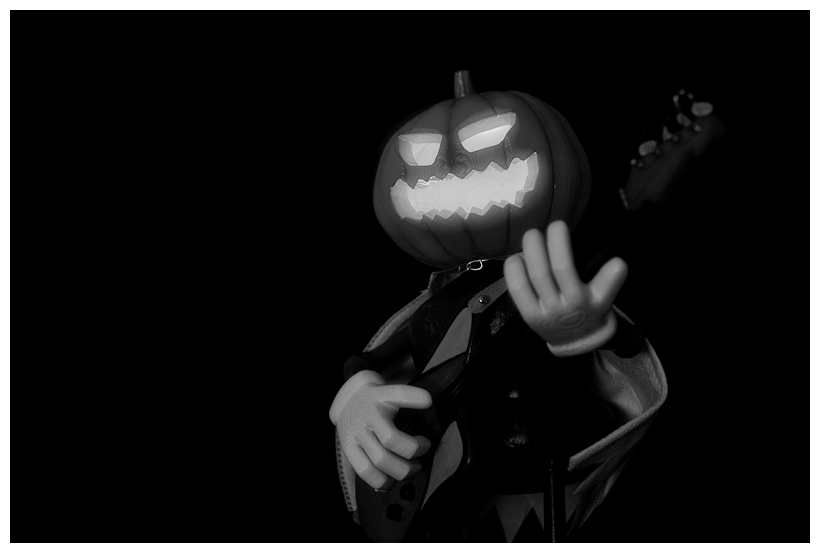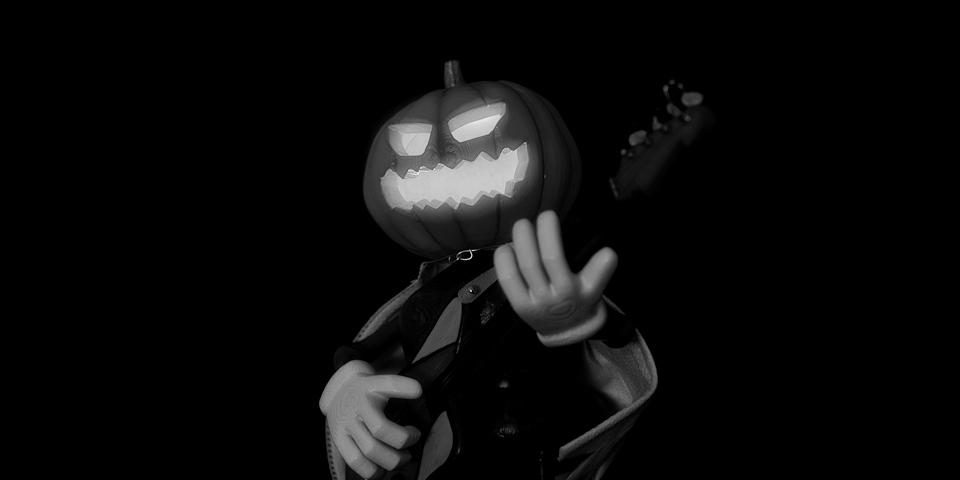
“Mr. Pumplkin” is a 1/10 scale plastic figure inspired by “Garageband” project. The guitarist singer in the former project is realized via 3D printer and detailed with acrylic paints. A little LED throwie gimmick is implemented to generate illumination from inside of pumpkin head.
1. Motivation
Couple of weeks ago, I visited Design Visualization Lab. (DVL) in School of Art and Design where I got MFA degree in 2006. I and my friends in creative coding group had a field trip to see their new 3D Printer. In fact, I saw this one last year while I was teaching one of Art class there. It was so facinating. I thought that I should try it out with some model I made then, however I was a bit busy doing other stuff. This time, it is definitely time to try.
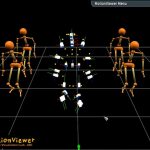
The first idea in my mind was the project I did in computer animation class a years ago, a Pumpkinhead Guitarist. The original model was designed in maya and our team used motion capture system to acquire performance for a song. You can find more details about this project here.
Here is a Guitarist Solo animation video clip. ( 1:28, Music “Neighborhood #3 (Power Out)” by Arcade Fire )
2. Prepration & Re-design a model
Since the original guitarist model was designed for animation, there are some parts need to be changed. For instance, single faced mesh visible from outsie camera does not have inner volume to form a mass in 3D printing. Therefore, I had to re-design or change its original mesh model, espeically head piece. Following two images shows the original design in Maya.
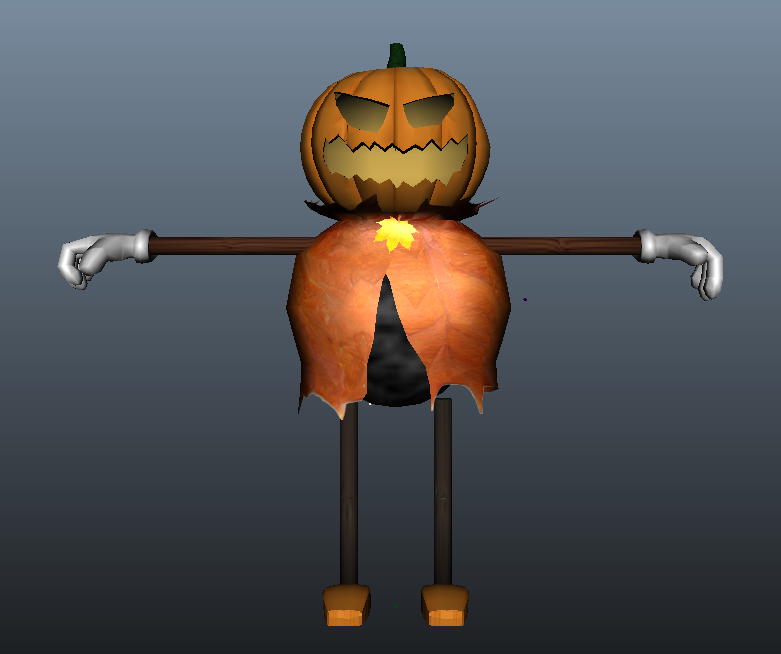
Also some parts of arm and leg were slightly changed such as more round ball shape knee and elbow. This is a bit of trick to hide somewhat annoying folding of mesh in cylinder shape joint area. Sure, it would make a model more rigid and stable too.
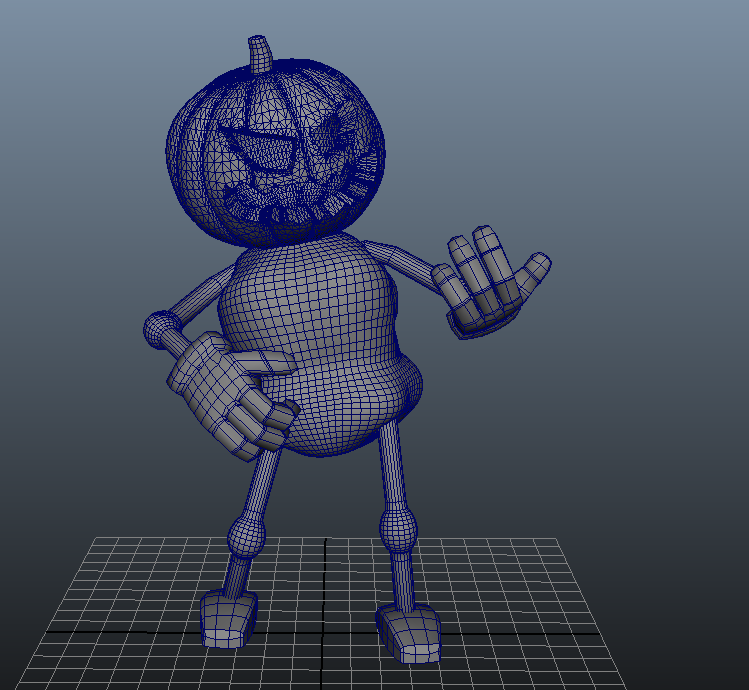
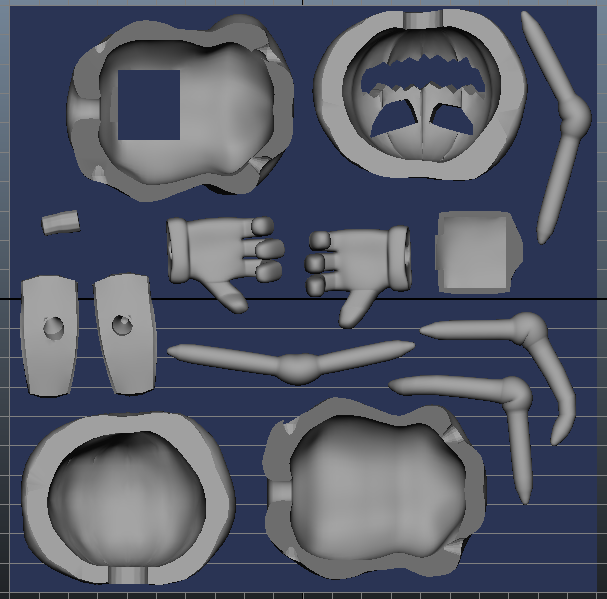
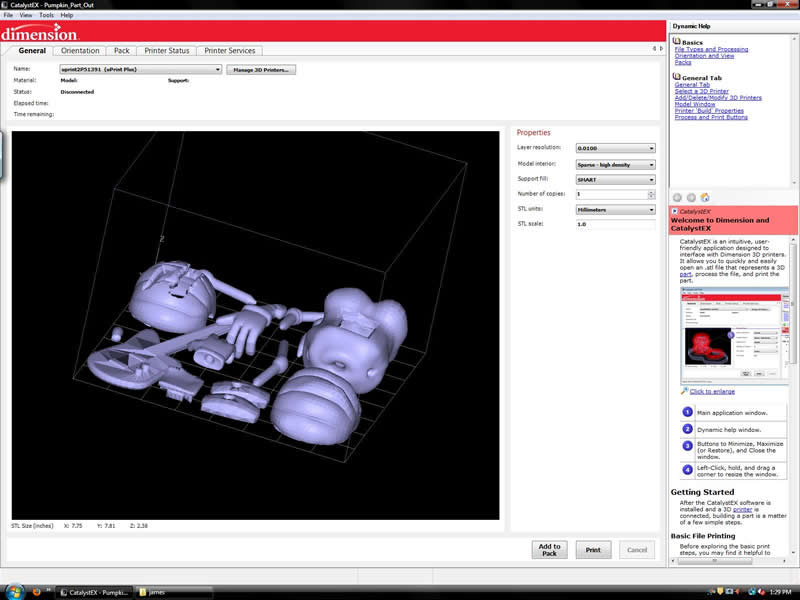
After re-modeling mesh, I laid down all parts within 8″x8″ plane to see if all components are fit to printing volume. In fact, some parts, head and body, were splited for later process (i.e. painting and led light parts).
3. 3D Printing!!!
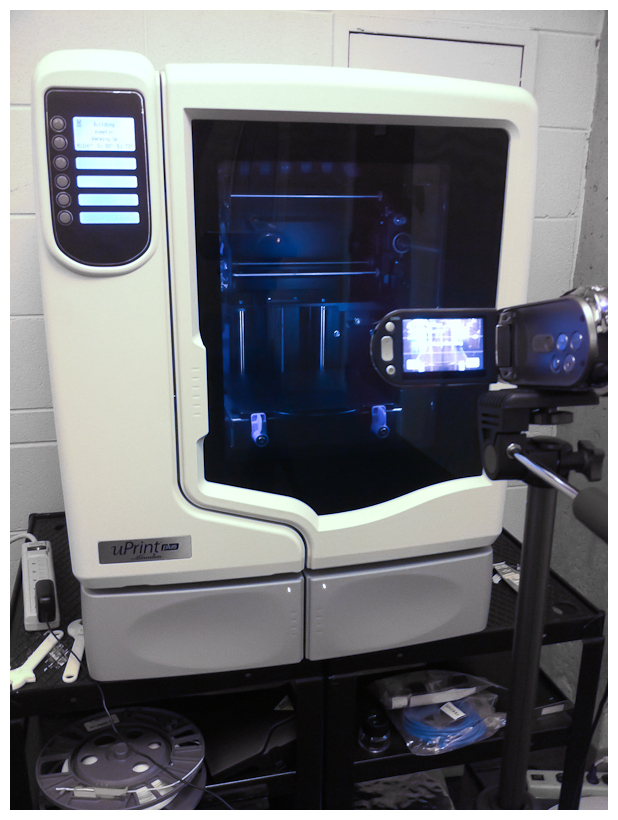
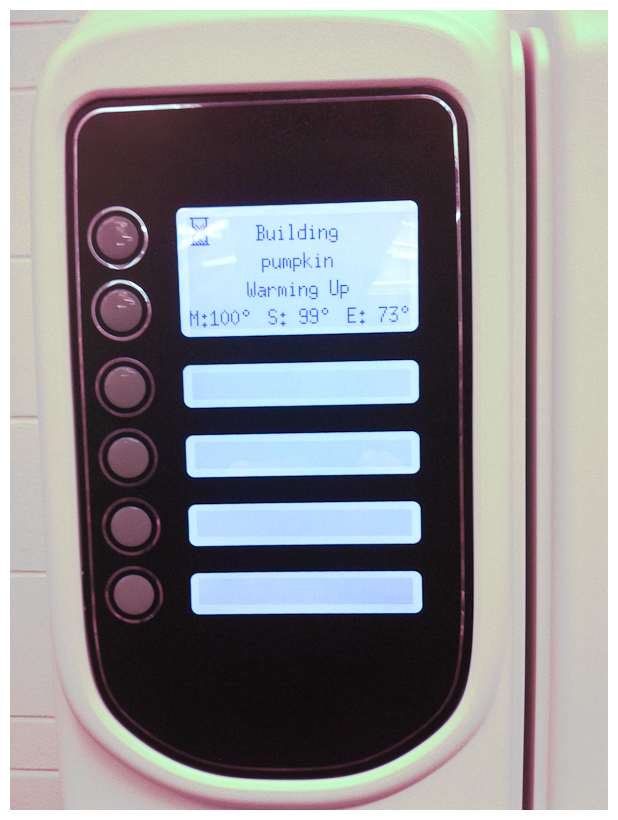
– Printer
DVL’s 3D printer is uPrint plus system from Dimension (see manufacturer’s webpage). Its max printing size (size of base pallette and height) is 8″ x 8″ x 6″. The printer looks like small size cabinet with glass window at a glance.
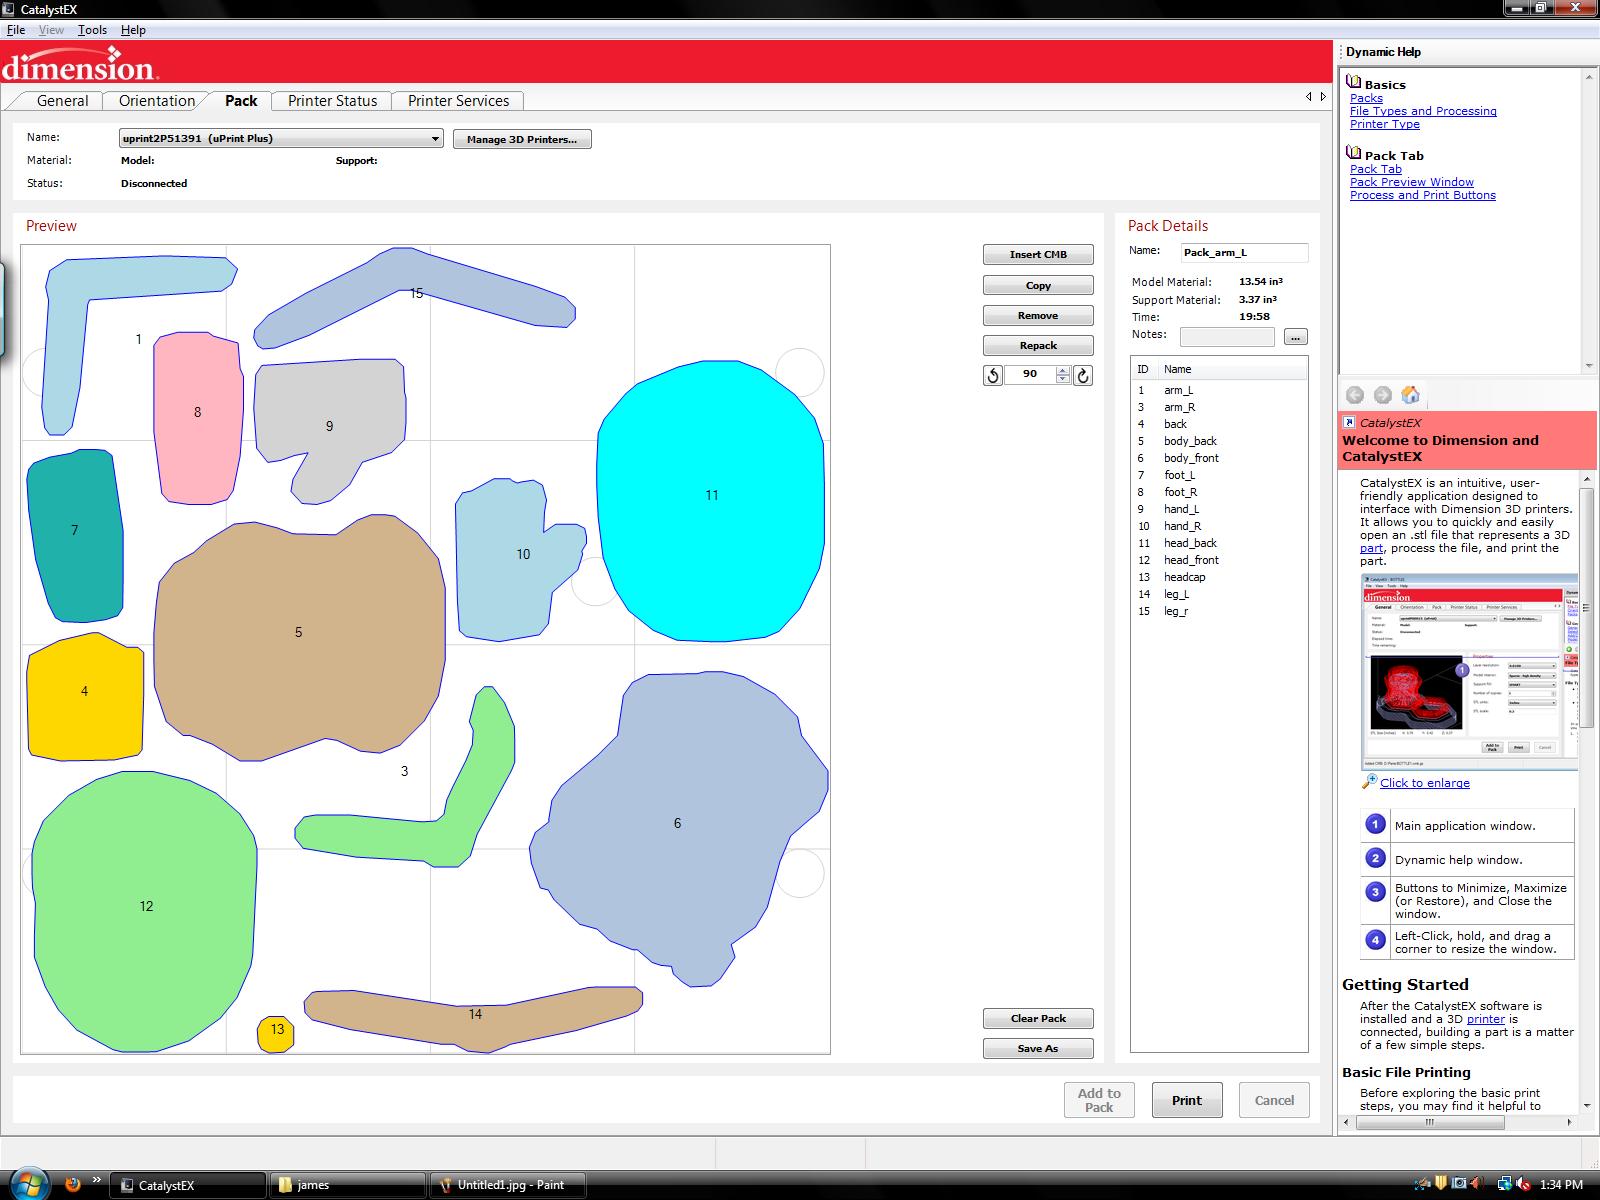
Once my model is ready to print out (file saved in STL format from Maya), then use printing software to nicely layout each model parts and pre-process model data for the printer, so-called packing. Below images show this step. During this step, we can decide its printing quality and material density. Since I liked to have some feel of weight, I asked for solid printing in highest quality setting. Ended up paying about $90 for my pumpkin model. Phew, it’s pricey.
Alright, ready to roll. Once printing job is queued, just need to push start button on printer’s control panel.
Below video clips shows 18 hours printing process as timelapse video (total 3:15). It was clearly overnight process.
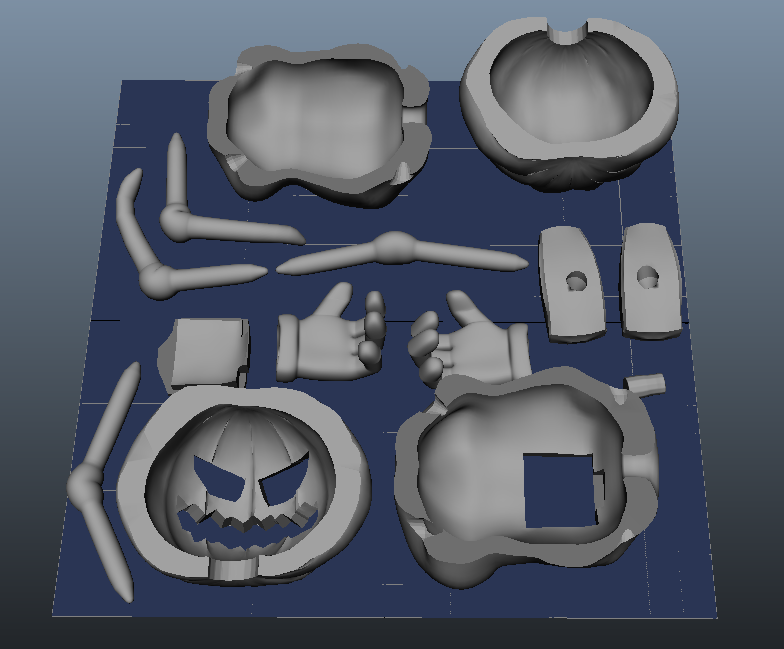
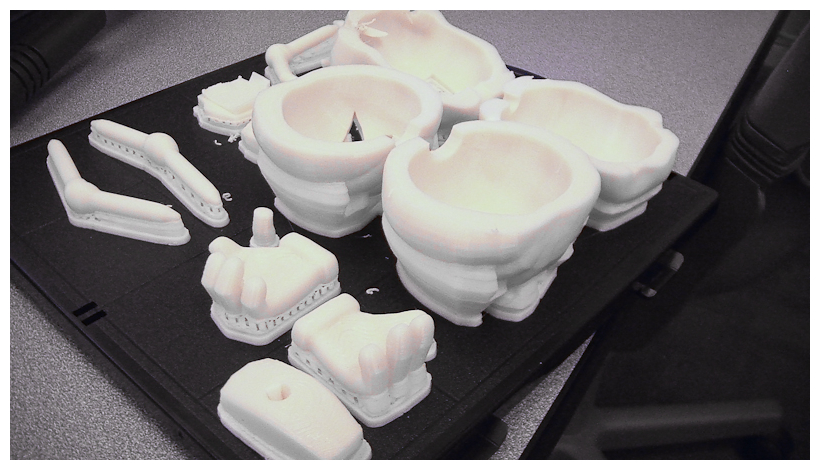
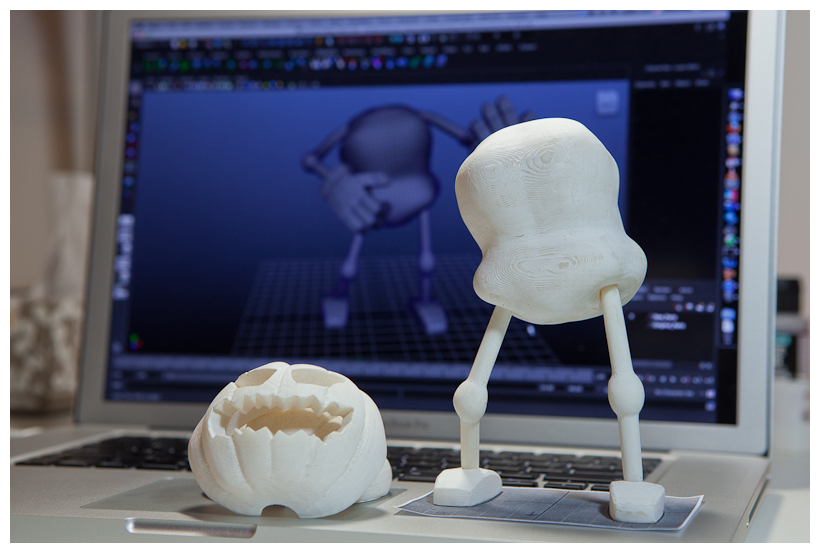
18 hours… after all. I got this printed model on palettee. As the printing process itself is layering melted ABS plastic on palettee, all the void area below model surface were filled with supporting material in honeycomb structure. You can see these in below image.
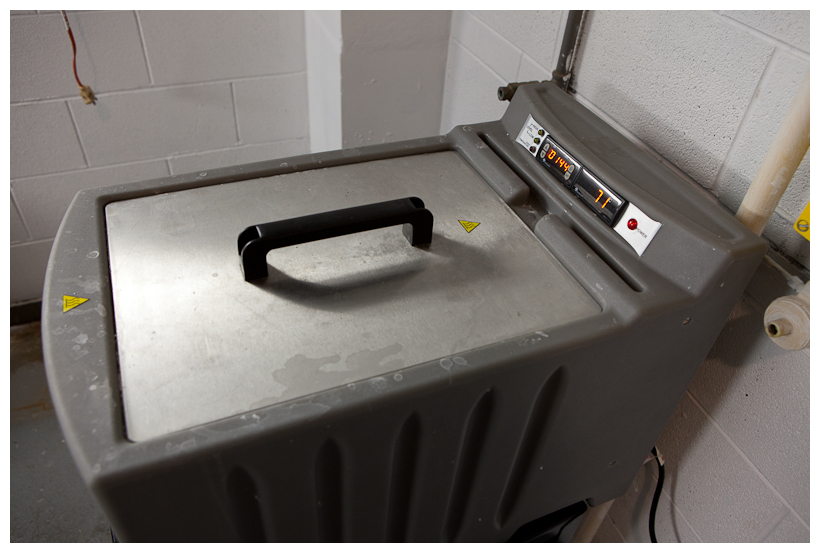
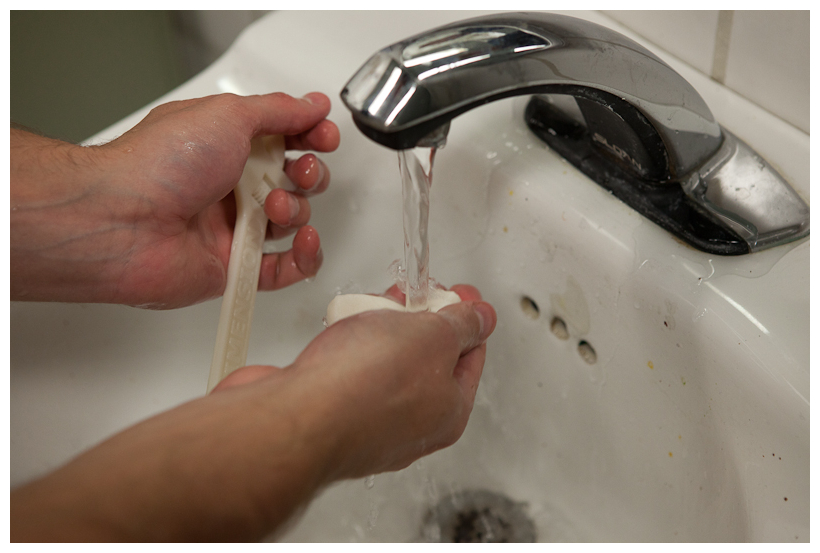
Then, it went through washing process which basically desolves unnecessary supporting material from model. Following images show wash tank. In case of small part, we can use steel cage not to lose parts in that deep tank with full of soap liquid.
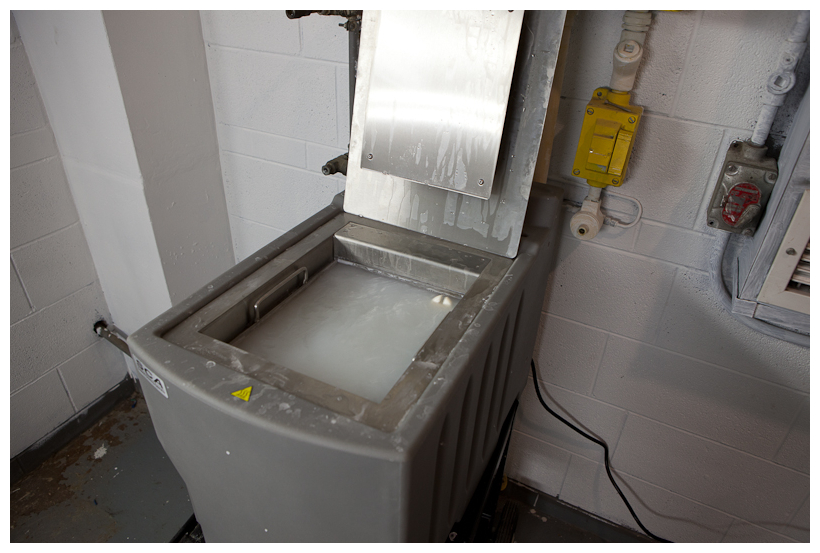
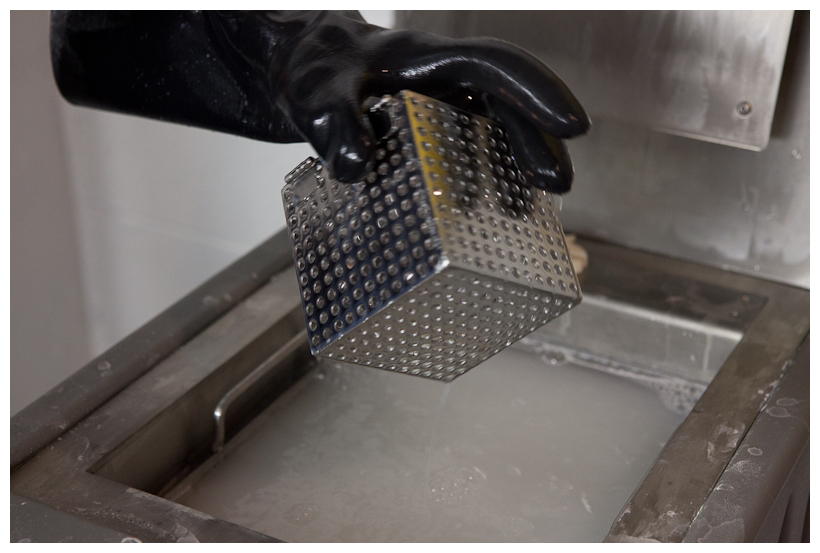
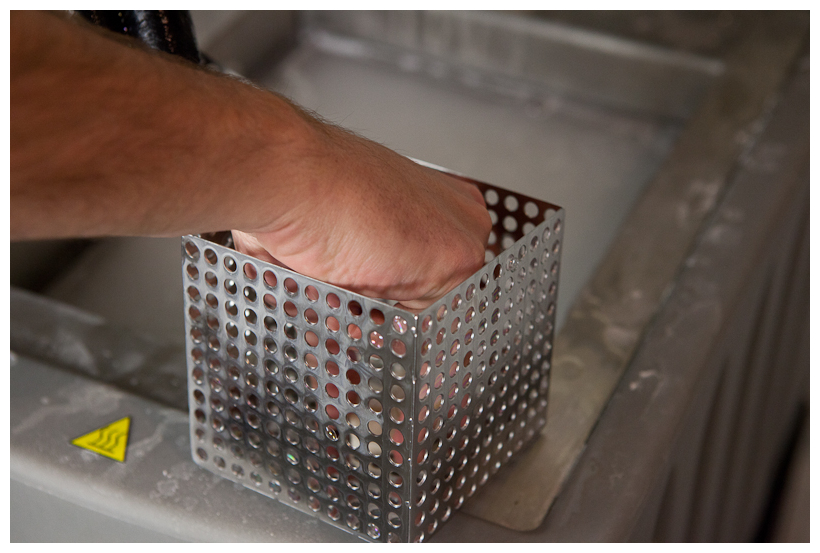
After a few hours washig process, all model came out clean and nice by itself. All parts pulled out of tank and rinsed with clean running water.
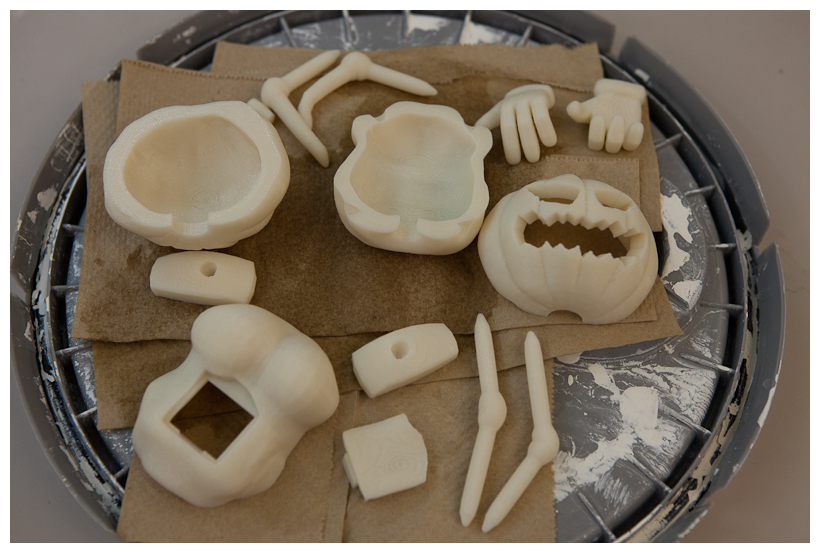
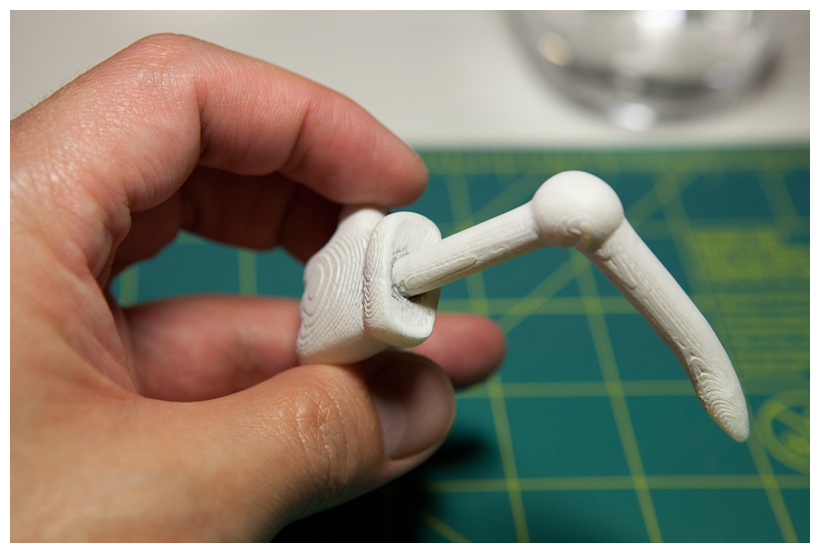
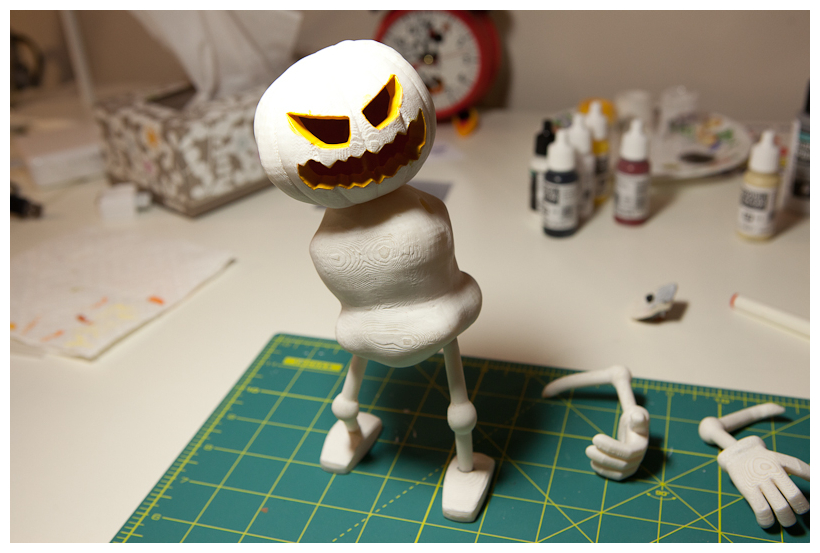
Hooray! Here all parts came out. Let them dry.

4. Assemble & Painting
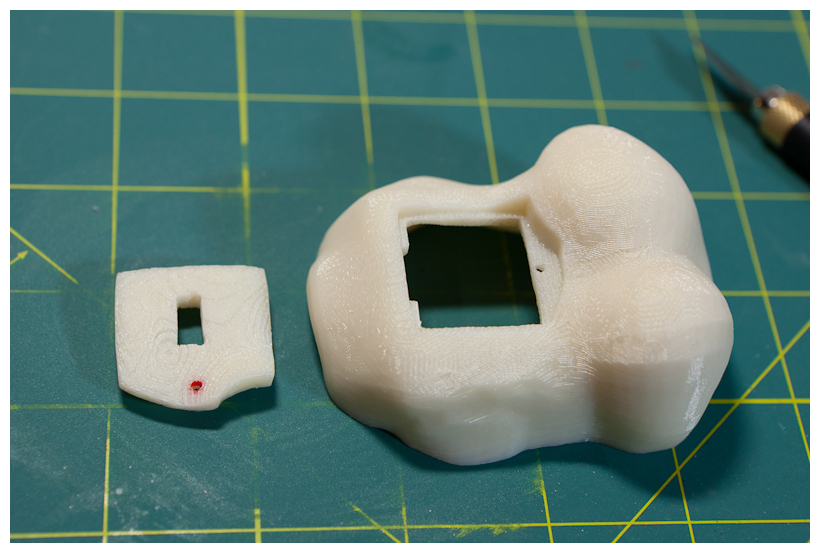
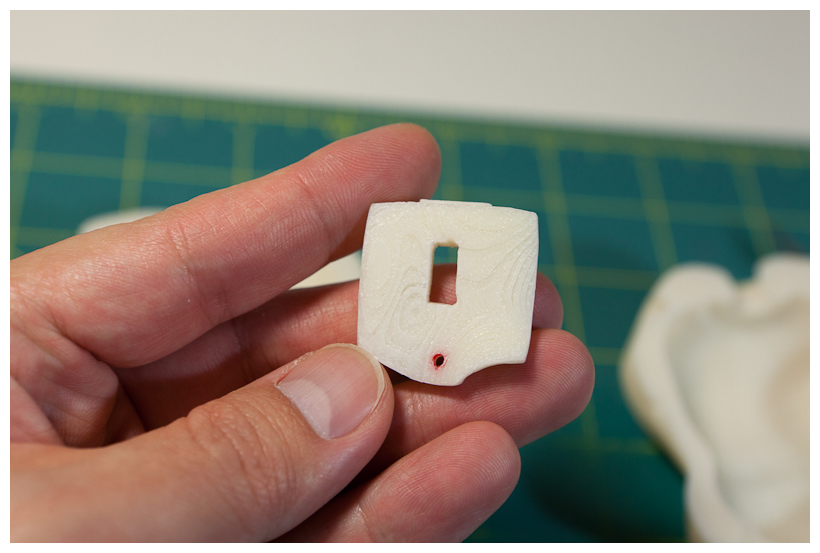
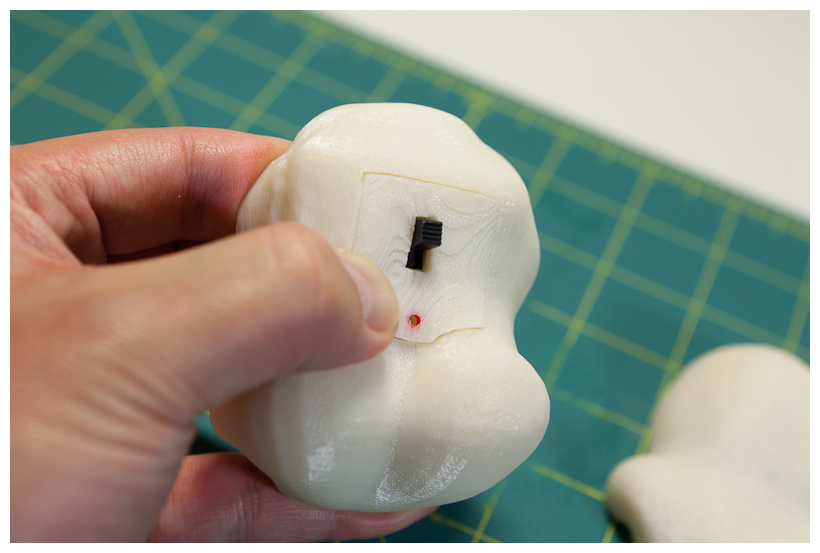
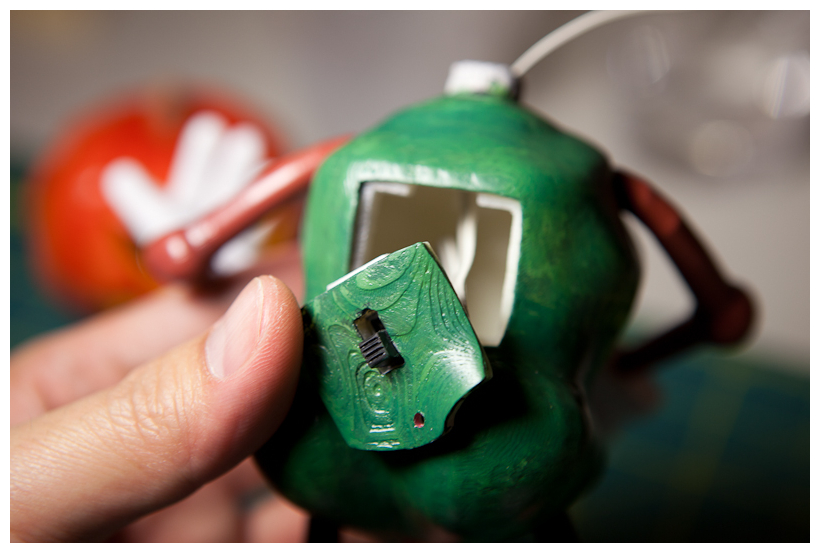
– A body for lighting switch
One thing for sure when I re-modeled body is to prepare for lighting battery and switch. They should be inside the body. So, I made more room there and opening. Made a rectagular hole for switch (in fact, I was not sure which switch I gonna use, so did not make a switch hole there in model at first). We can see more details of lighting stuff later.

– Clean up model surface
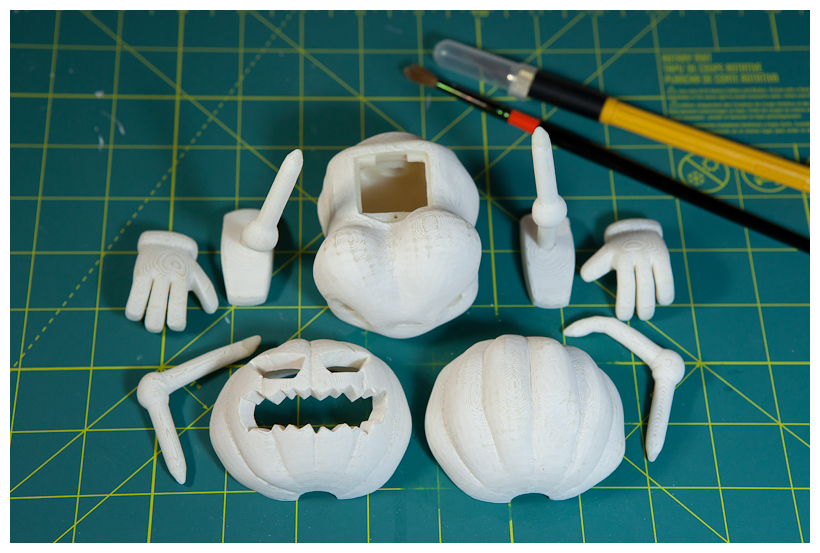
All model surface were cleaned before starting painting. Firstly, all parts were sanded with Grit 600 & 1000 sanding paper. Then, applied plastic putty to fill rough holes and thick traces of printing layers. Lastly used white primer for better painting.


Here are cleaned parts with putty and primer applied.
– Assemble
Plastic putty also helps to fill the visible seam on glued part such as head in below case. Apply putty around seam and sand it again. It will be invisible after painting.
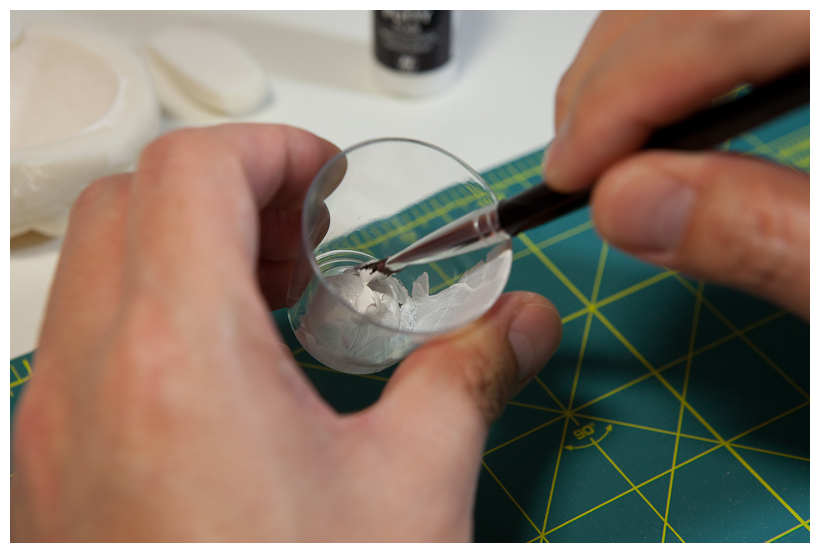
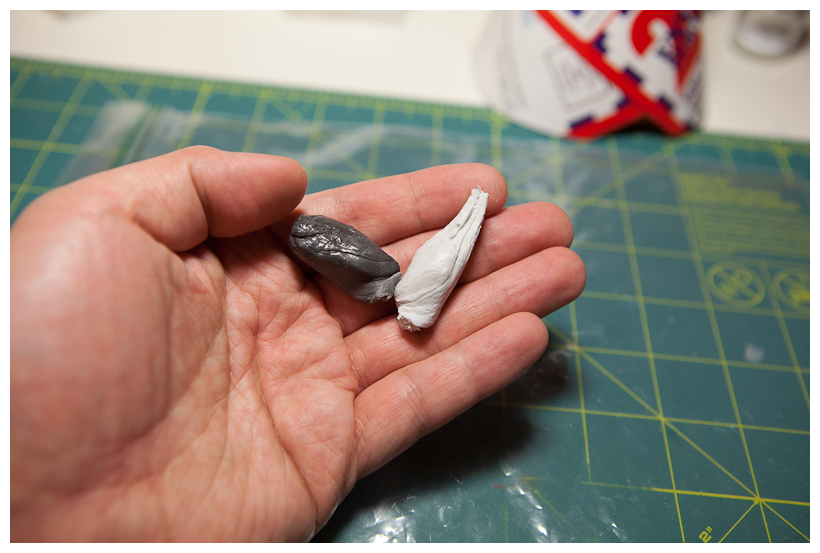
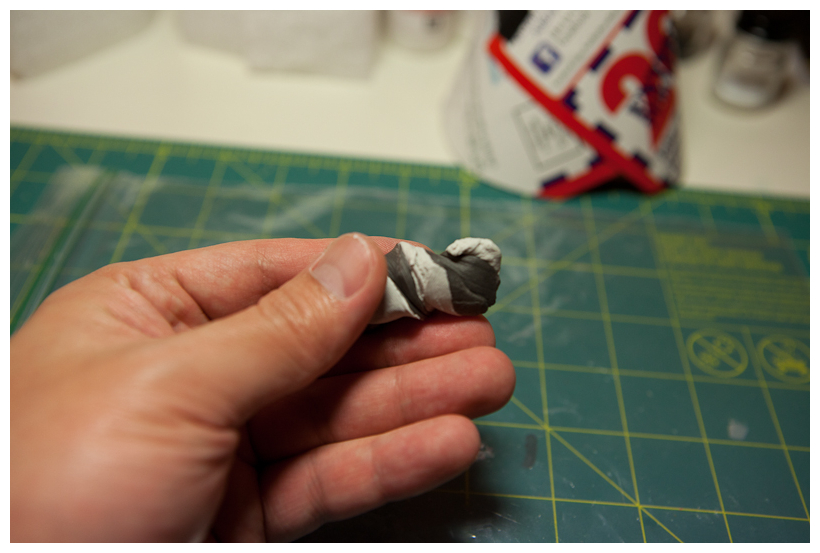
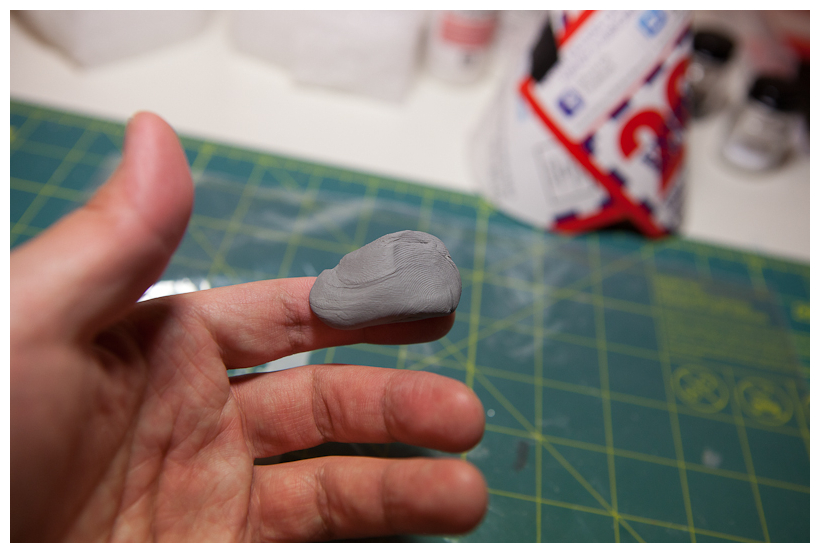
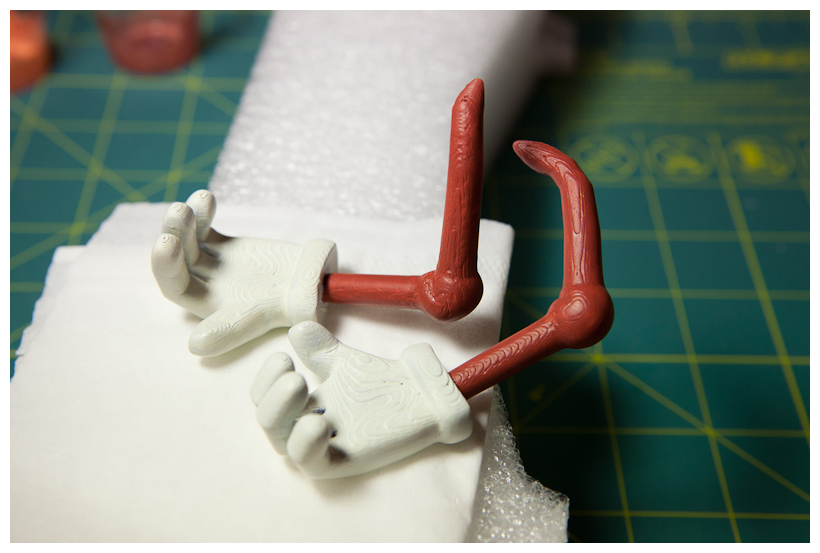
To glue hand and arm, foot and leg, epoxy putty was used. This is because there is a bit of gap between parts, which makes cement type glue not work that well. Epoxy putty fills gaps well and it dries out quite strong in a day. It works as almost same as good cement or glue in this case.
Epoxy putty is consist of two separate types of material, resin and hardener. (see dark and white in the picture). Mix them well together, then put a small amount into a hole and stick the part firmly.
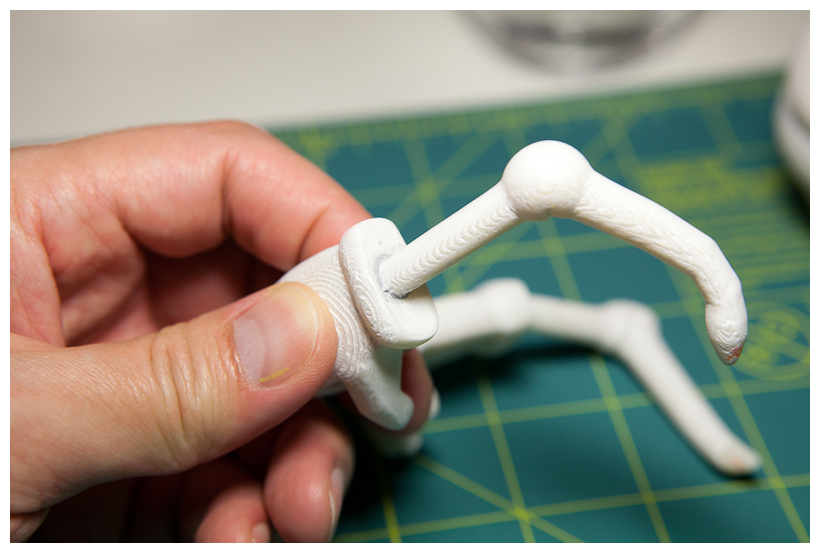
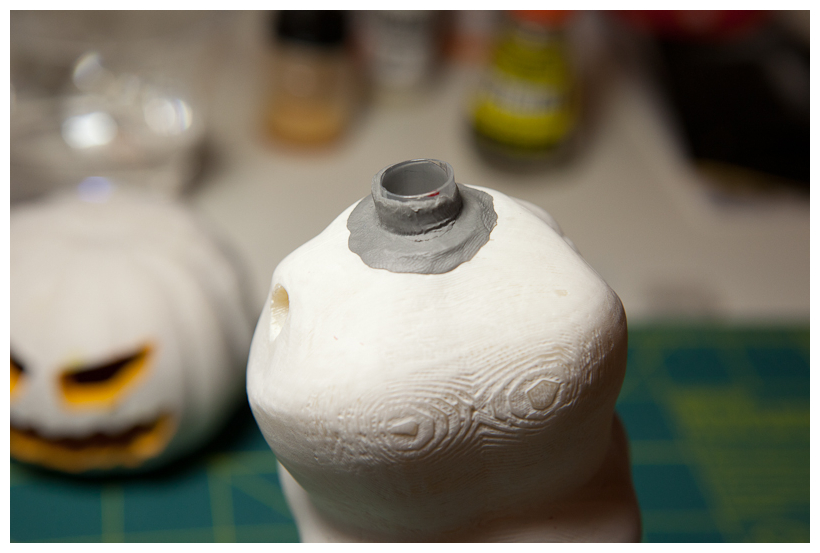
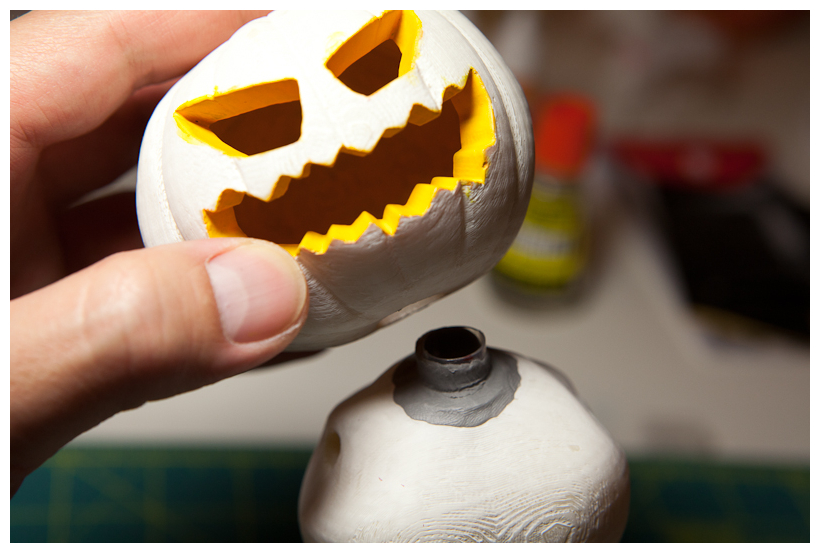
Since I did not make all details of my model before printing, some parts need specical care. Especially, attaching a head on body part was post modeling. There were only holes each parts considering light LED wiring.
Either I had to glue it or make something to tie together. I found something useful in my toolbox, a plastic pipette. Cut a top part of it and tried to insert it into a hole in body part. Bingo, perfect fit. Glued and cut off top part to make a hole through for later wiring.
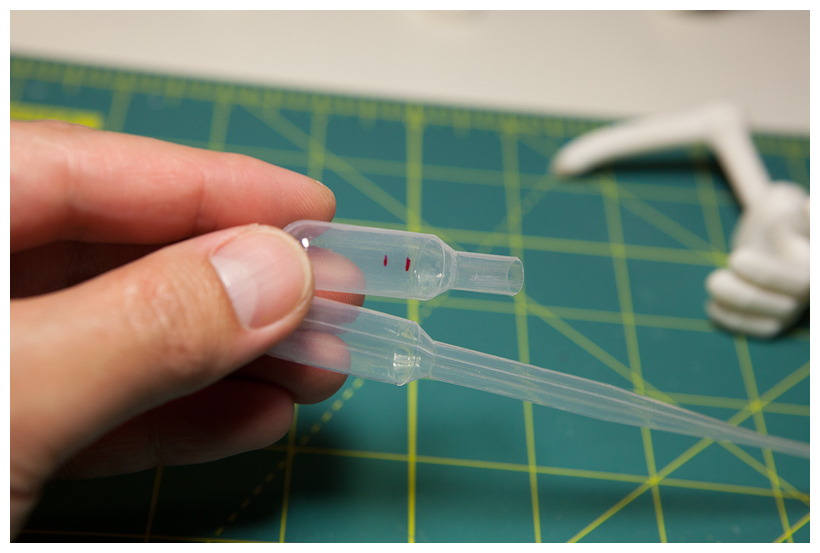
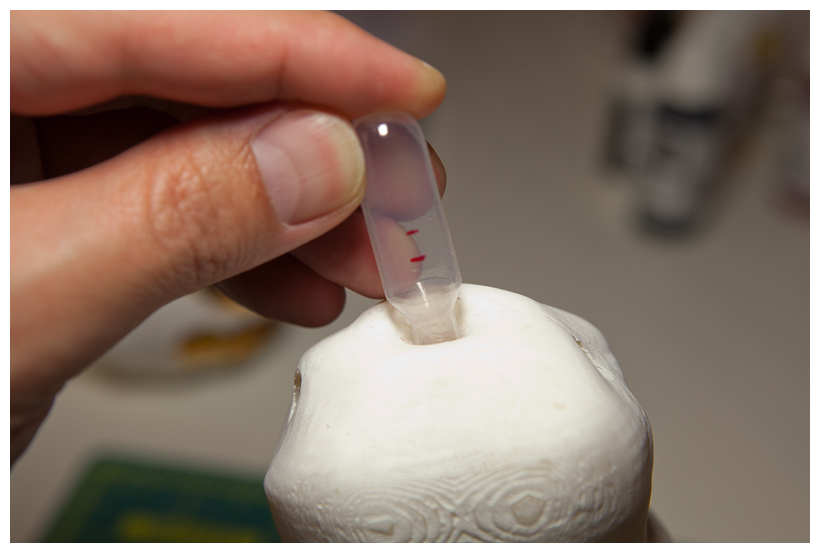
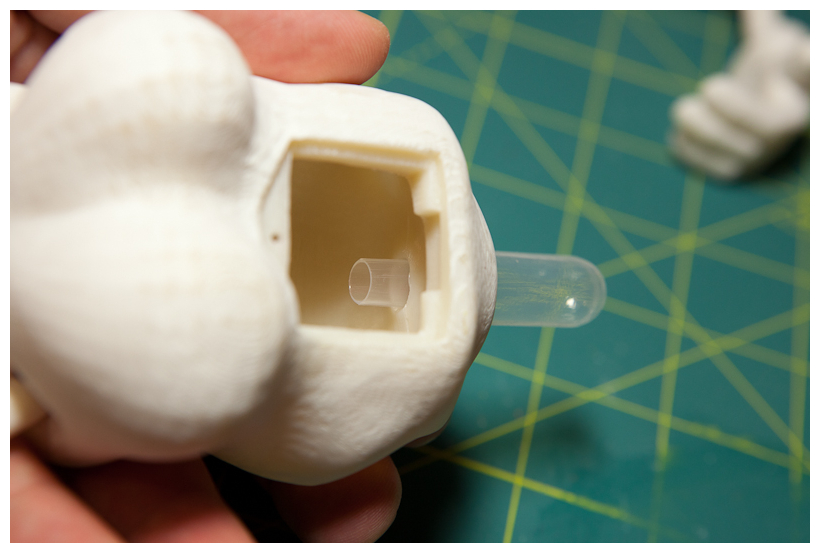
The size of pipette was a bit smaller than a hole in head part. So, added some epoxy putty around to make it tighter.
– Painting
Painting is a whole lot fun process. Needed lots of thinking, planning, trial and error fix. There are many different types of paints for hobby project however my choice was an acrylic paint. Most importantly this is becasue it is hazadous fume, odor free and water based. Good for home use without concerning too much of health issue nor sophiscated tools required in other paint types.
Started with hands.
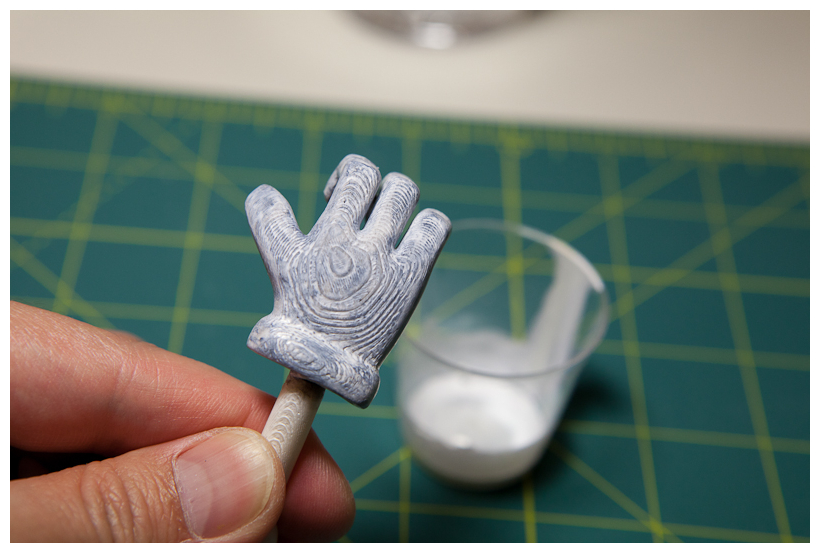
Initially, I planned to sand out all traces of printing layers and make my model smooth. However, I realized that it would be cool to leave it as is something like carved wood feel to it. For hand, applied black base color first and slightly washed it using a cotton swab so that it does not affect too much on later top color, white.
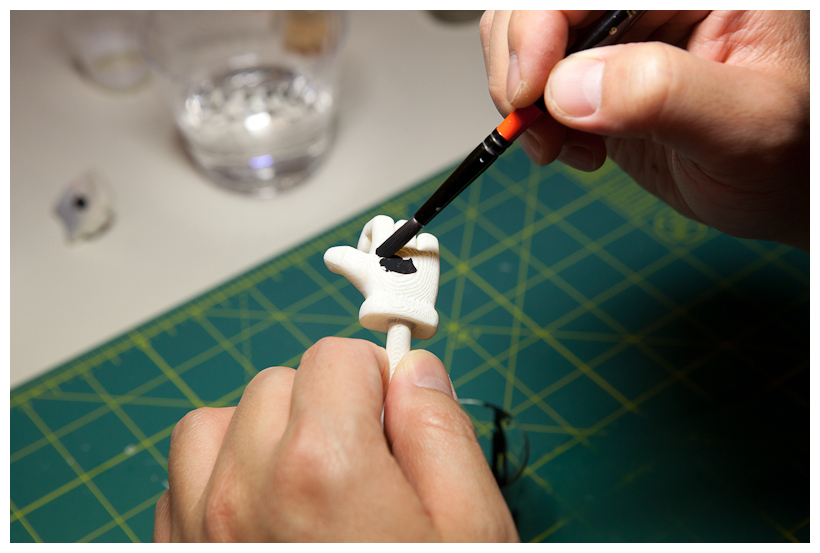
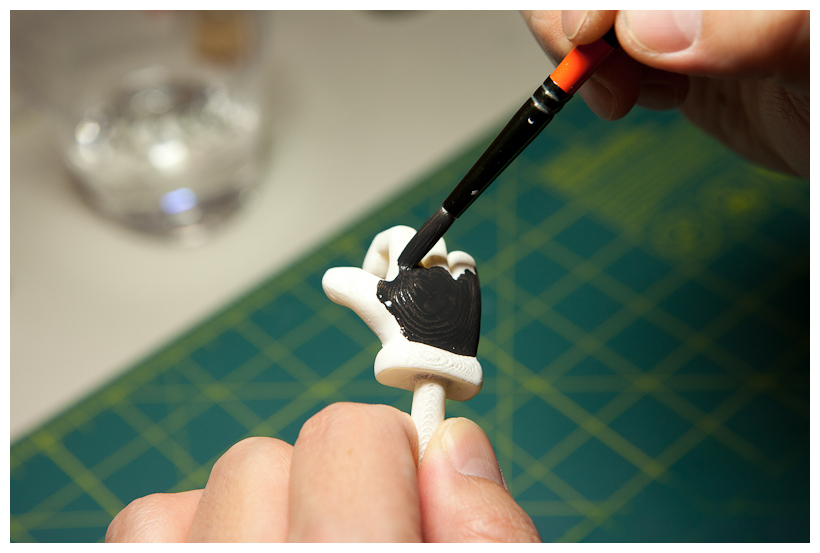
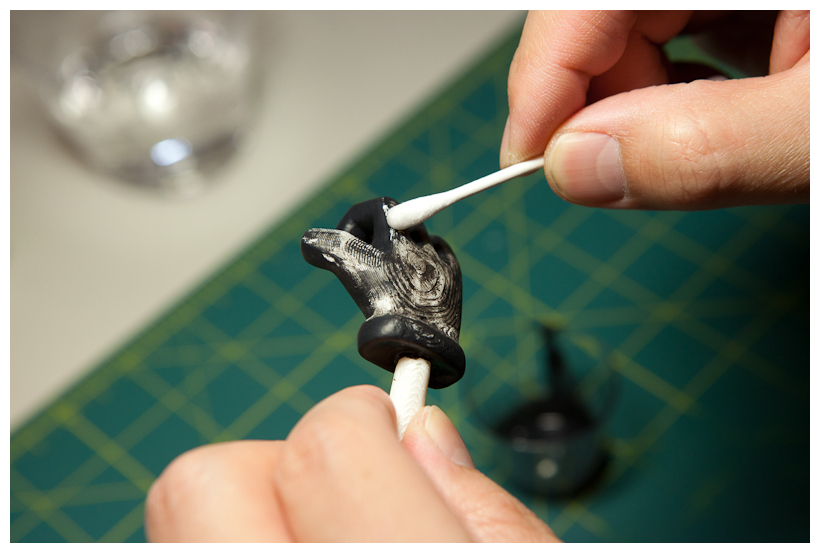
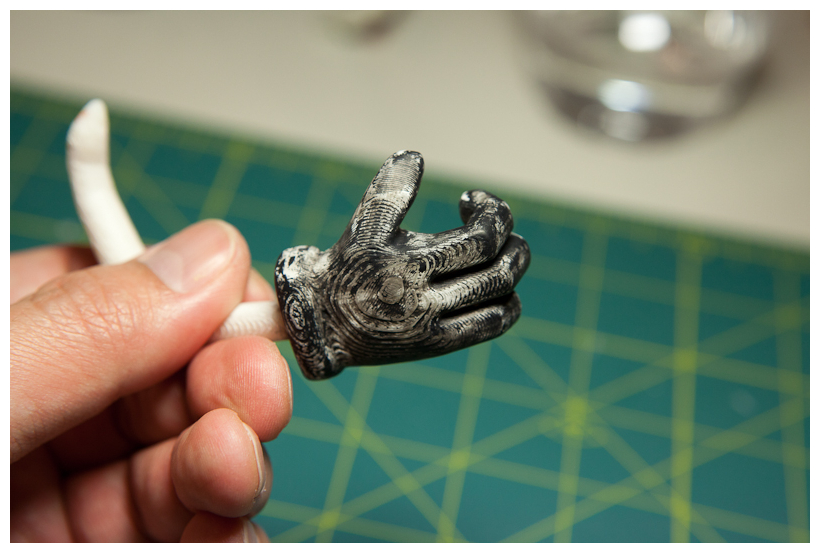
Multiple layers of white painting blends well with base black to create smooth natural shade around hand model.

Arm is painted with dark brown like some sort of tree branch.
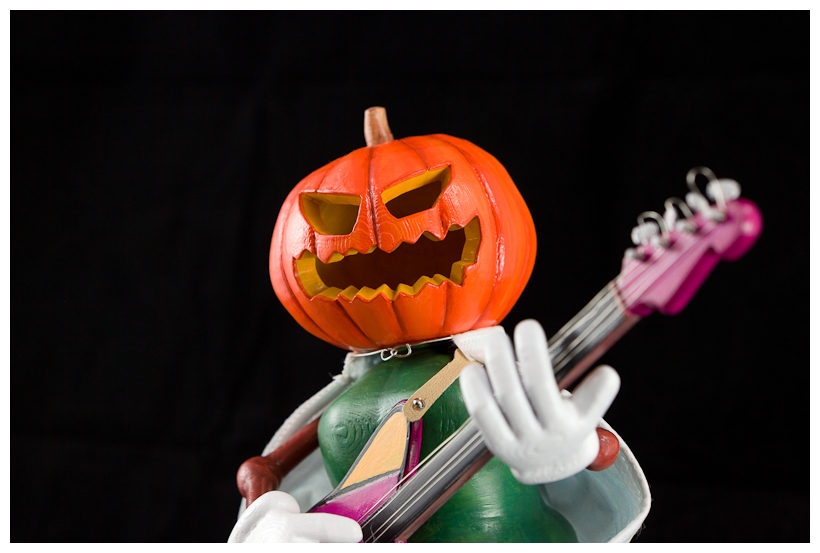
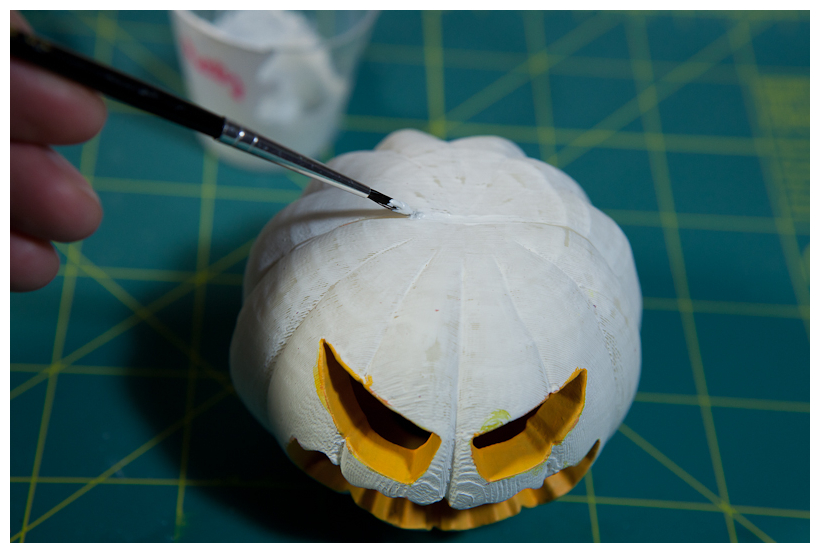
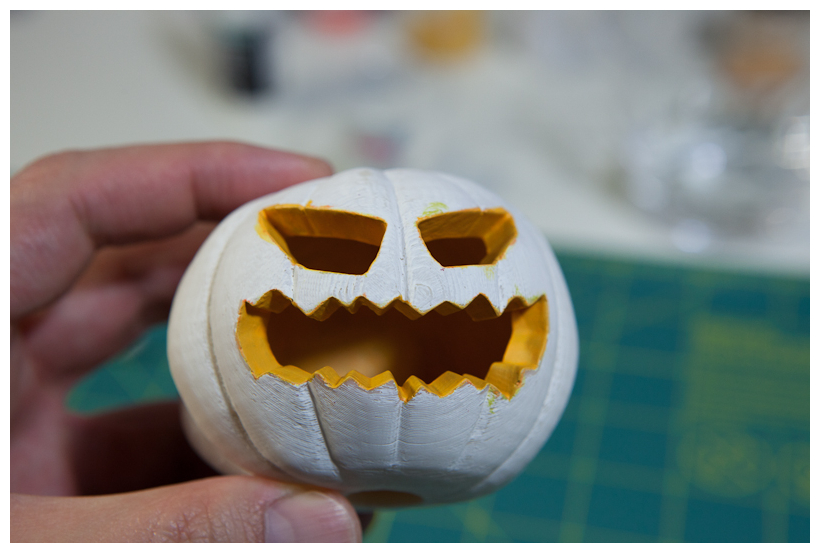
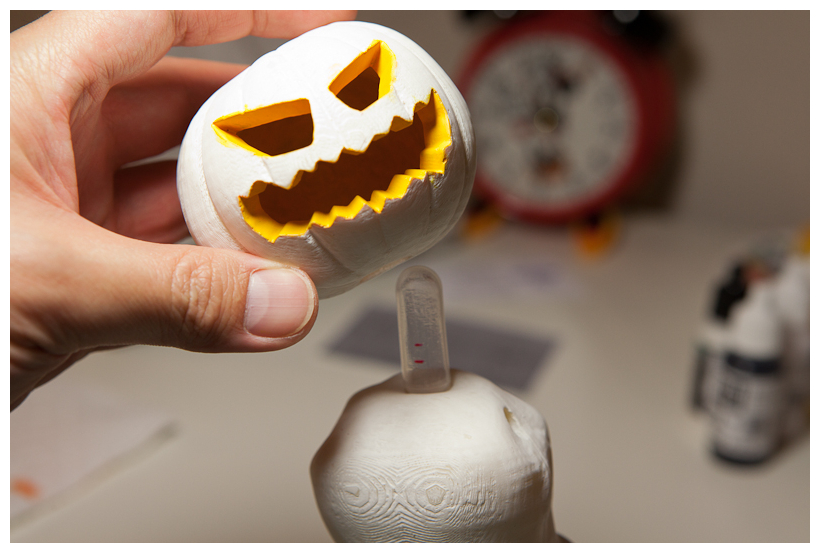
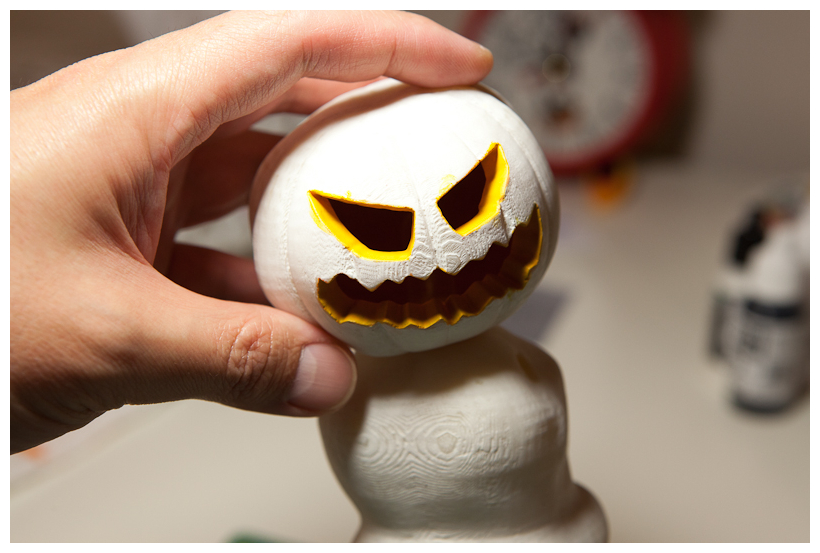
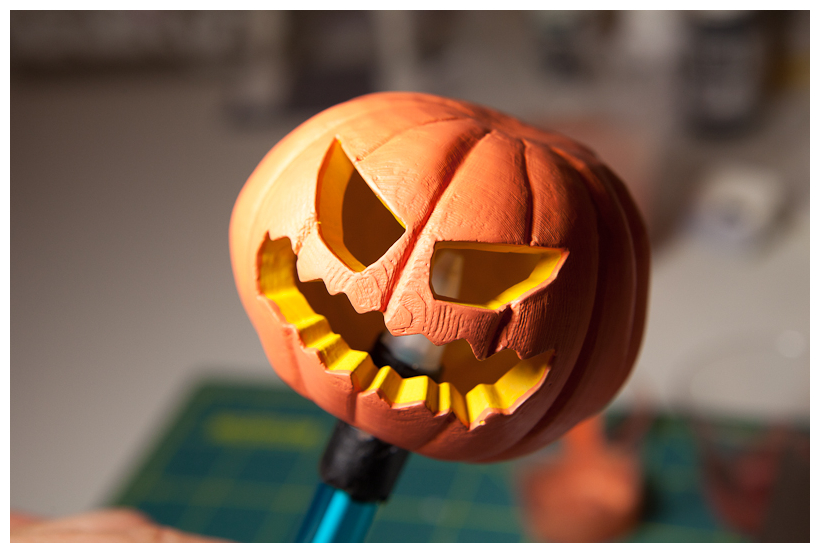
Here a head goes. Pumpkinhead is the most important part in the whole model. I started with base color, mid-tone orange. Then, created multiple layers of shadow and highlight with various orange tone. Inner part of head is painted with yellowish color before glued them together.

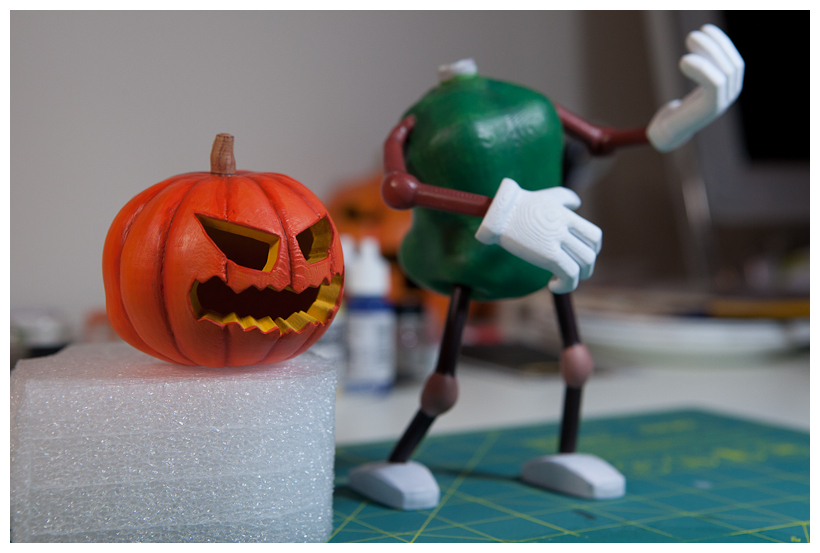
Body is greenish. Here is all pieces painted.
– LED lighting
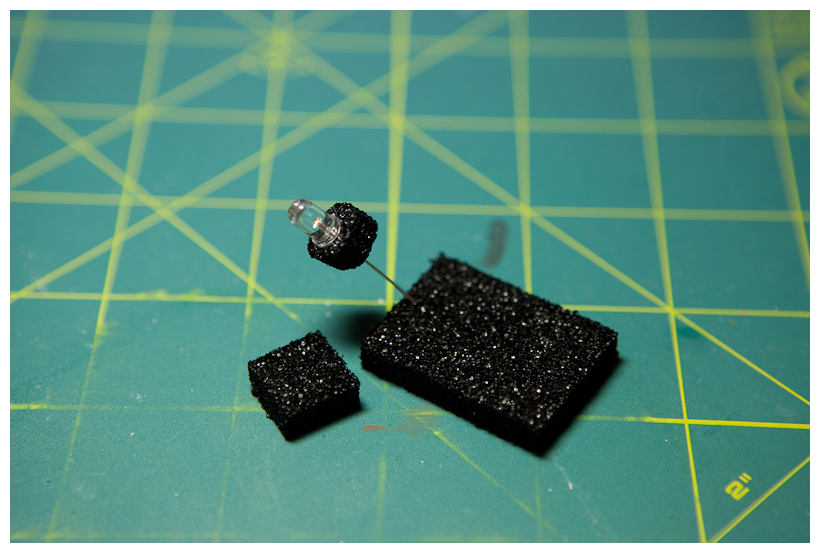
For sure, I need a light inside of a pumpkinhead. It completes the concept of halloween pumpkinhead. The simplest solution is to use a small bright LED. With coin cell battery, making LED throwie style gadget is easy enough to try. Found a good battery holder and small switch from a local radioshack.

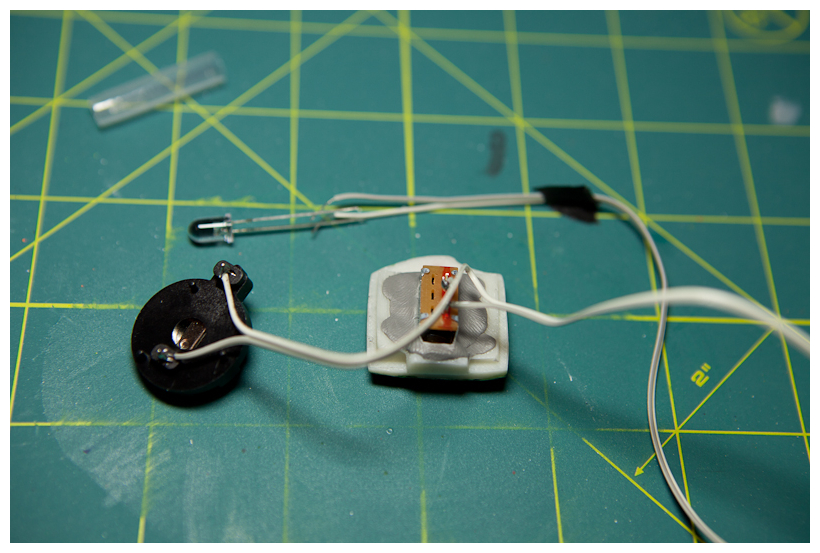
To insert LED inside neck tube made out of plastic pipette, used black sponge I found in my circuit toolbox that came with a little IC components. Cut it round to fit inside tube and inserted LED leads through it.
As LED assembly is ready, get all pieces inside body. Two wires goes through neck tube to connect LED.
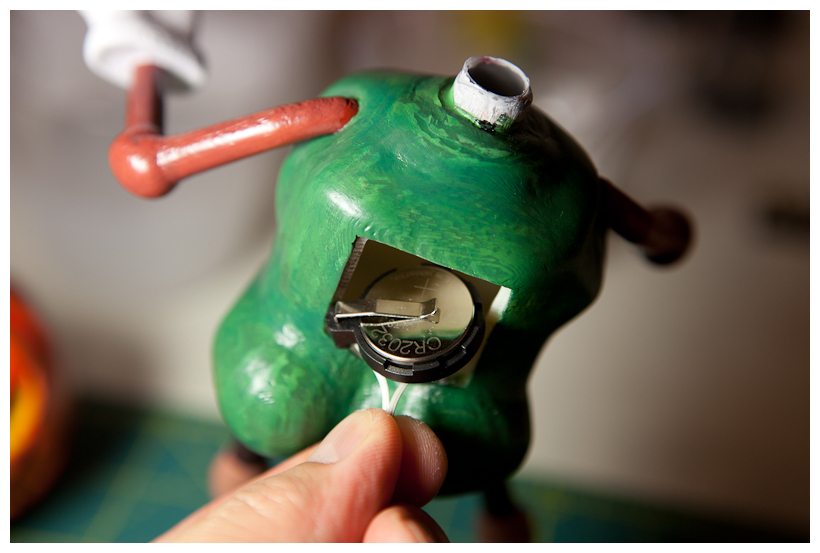
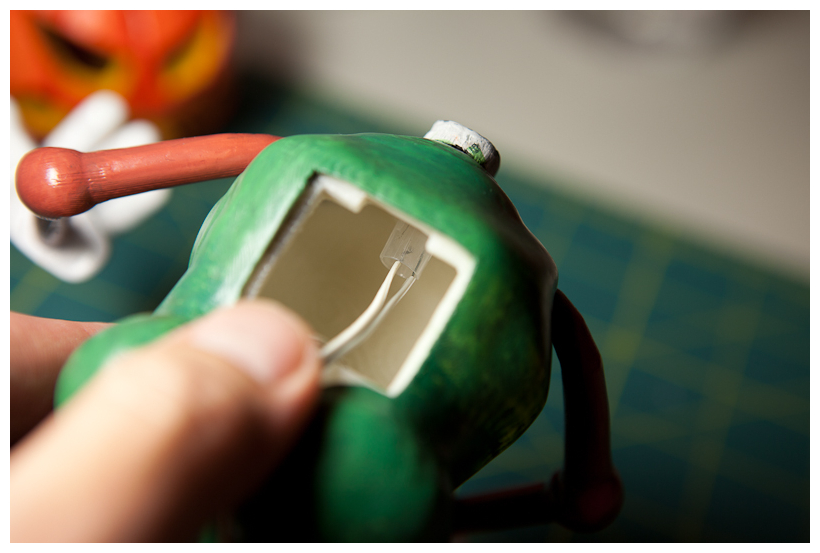
Then, cover its back opening with a switch panel.

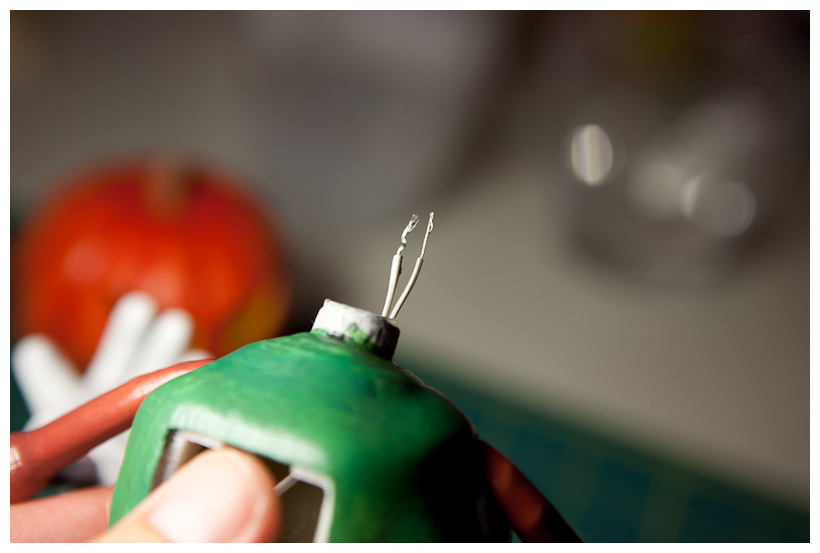
Connect LED (sure soldered it) and insert it into neck.
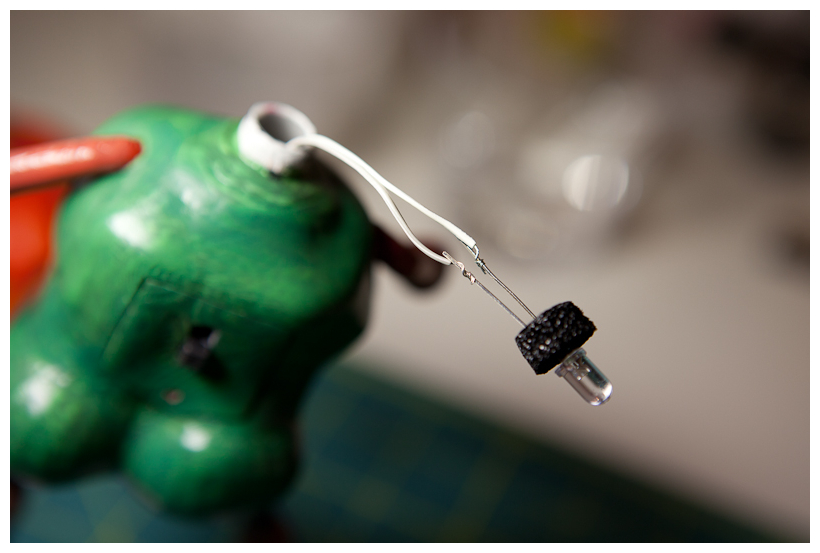
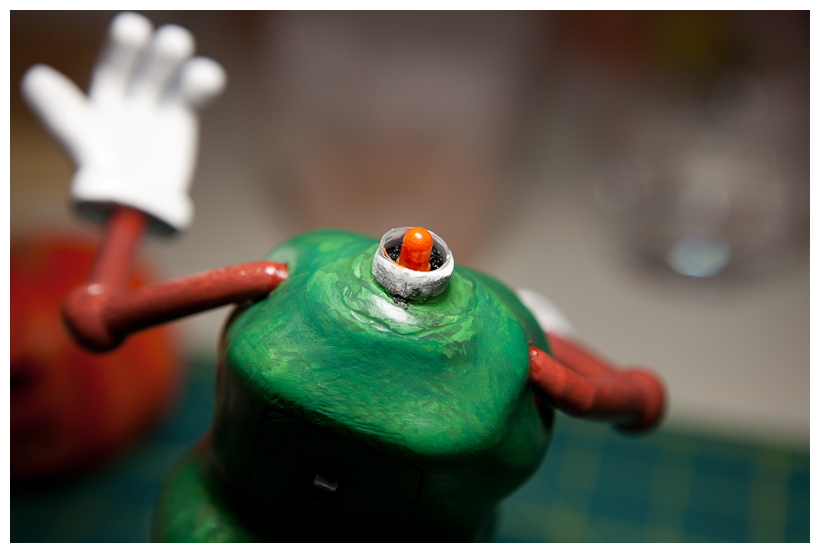
Since this LED is bright white color, I added some orange paint around to help lighting color match to a candle light.
Unfortunately, the LED I used is not that bright even though it is rated as ultra bright one. But it is OK. I can see the light coming out of it.
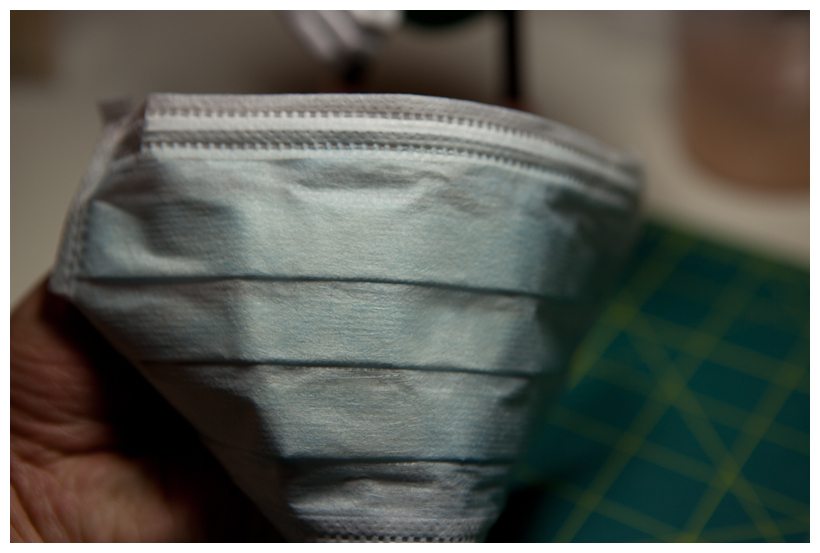
– Cloak!!!
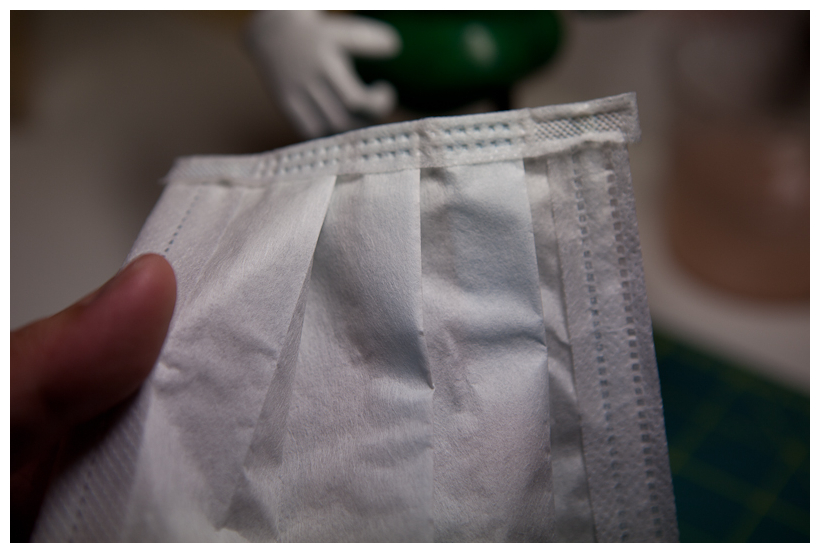
Well, a cloak is supposed to something like fabric. The original design was using some kind of fall leaves around it but I thought that it may look strange with pastel tone arcrylic colored body. Sure enough I wanted something simple to build. I admit myself lazy person not to spend too much time for it. So, I looked around my closet and storage boxes I usually put all misc. stuff at home. Whala, there was one that might work, Earloop Mask. I purchased it when we had life threatening flu years ago (used for international trip 🙂 ).

It has some wrinkles, folds and fabric like texture.
Had cut unnecessary cotton earloop string.
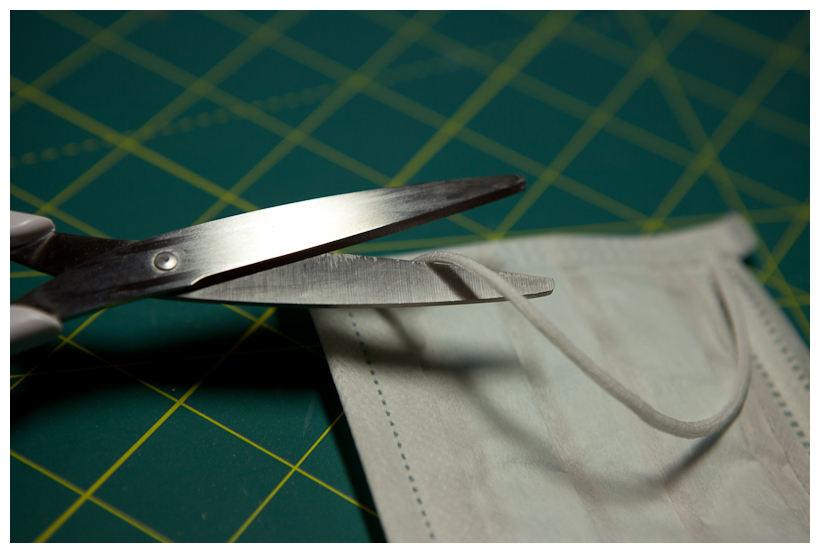
Inserted steel wire around edge of it to help easy shaping.
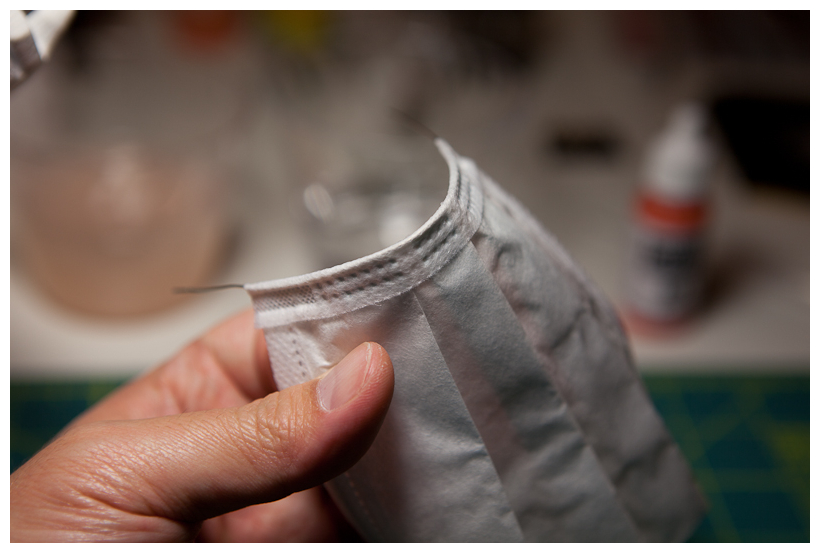
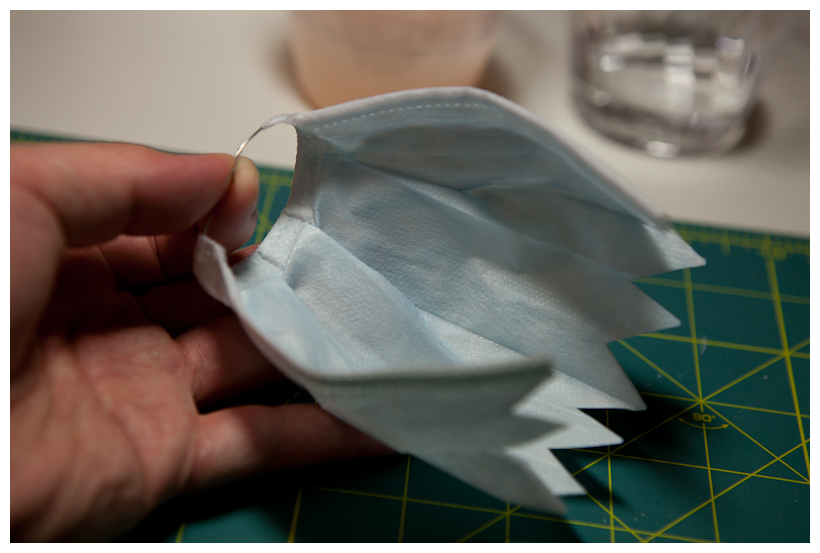
Trimed bottom edge in zigzag. Looks Cool. 🙂
– Guitar
Final piece of model is a guitar. Well, even though 3D printer has great precision and resolution, a guitar has too much of details such as thin wires and fixtures. Therefore, I simplified its model quite a bit and did some post-modeling to create details back.

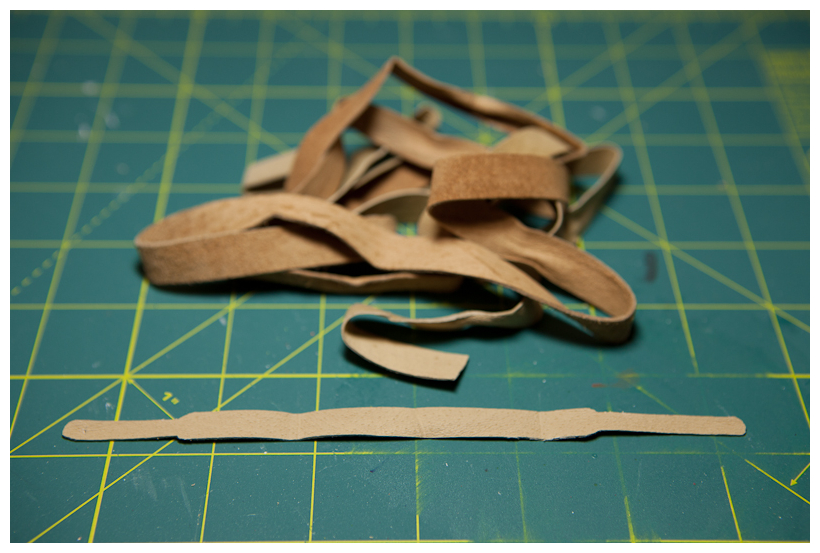
Firstly, made a guitar strap out of a leather string I found in local art supplies.
Many details of modeling parts were not photographed here but following pictures show its completed model.
Made a few holes around using pin-vise to add strap screw and wire fixture. Those wire fixture is made out of a wooden toothpick. 🙂
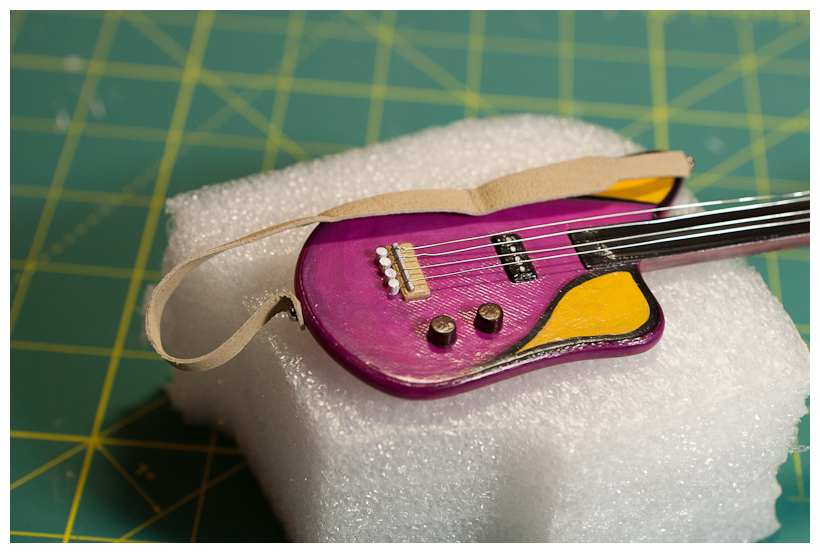
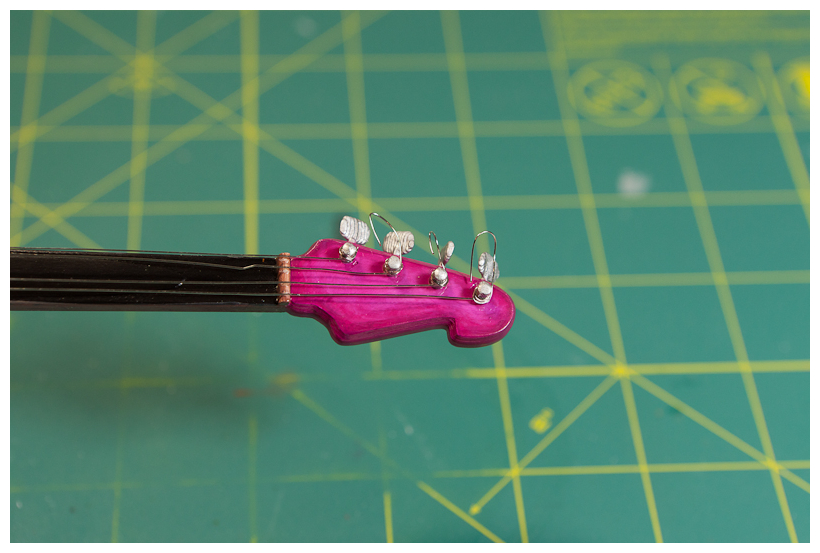
Thin steel wire (AWG 28) is used for guitar strings.
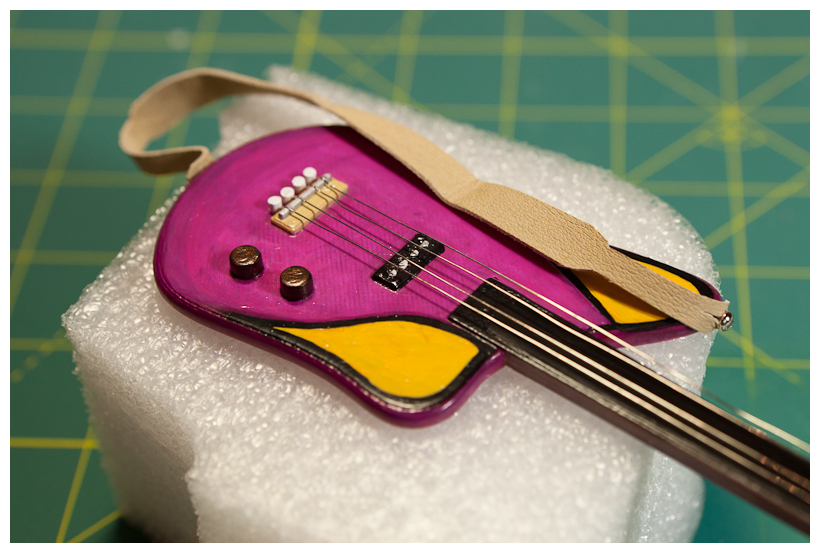
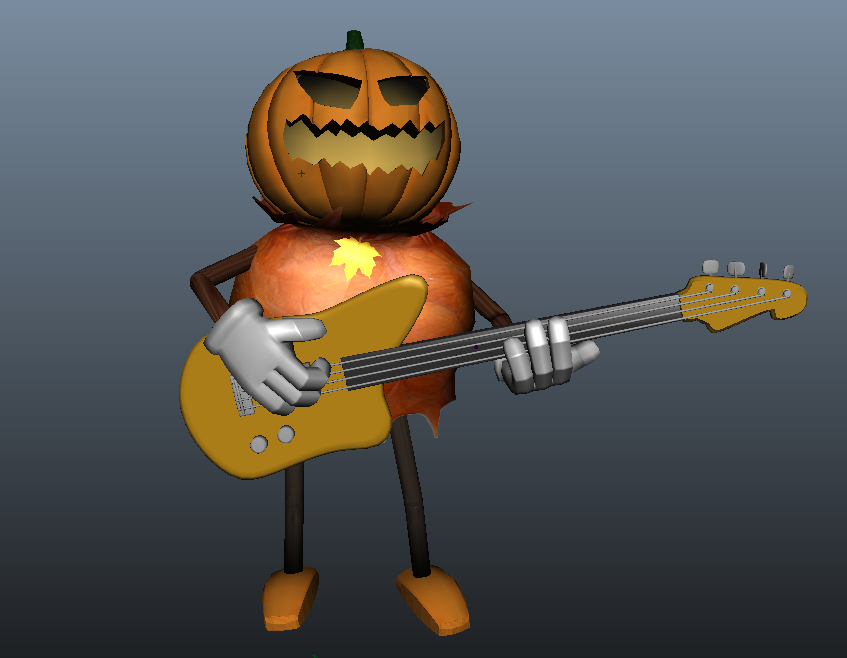
Here is the final model assembled and painted!
After painting job done, protective acrylic varnish was applied a few times.
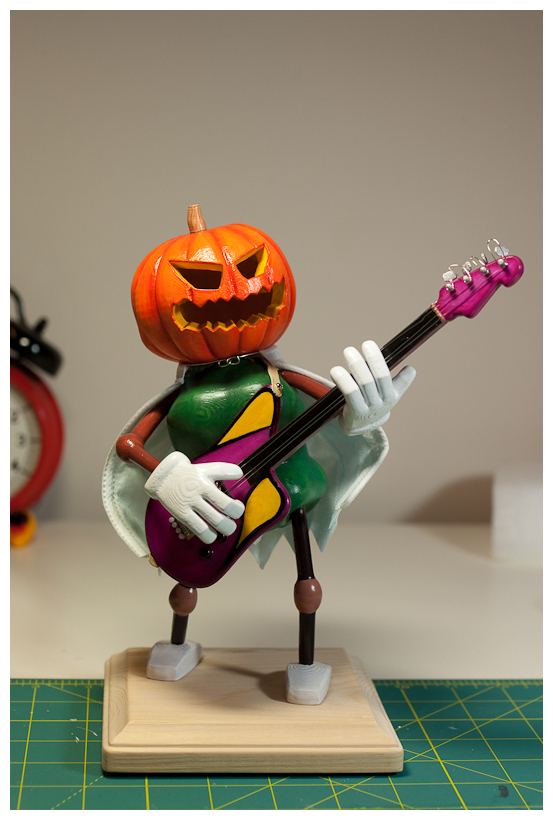
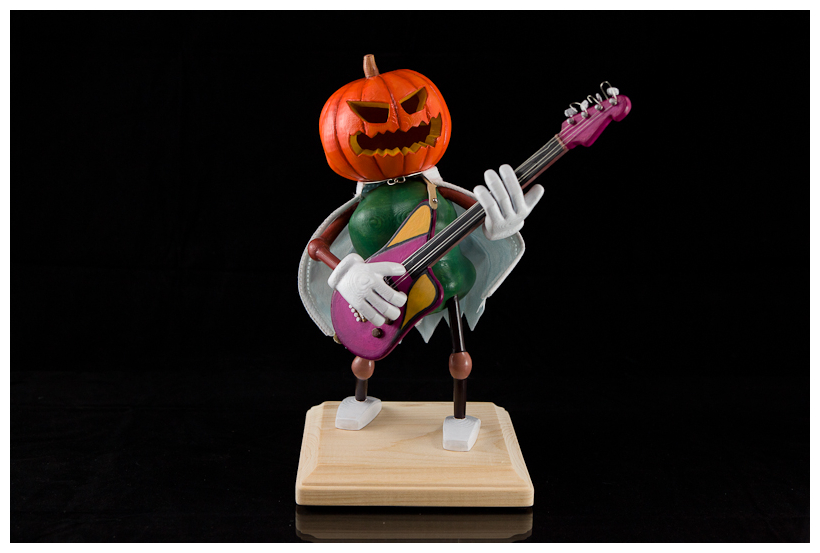
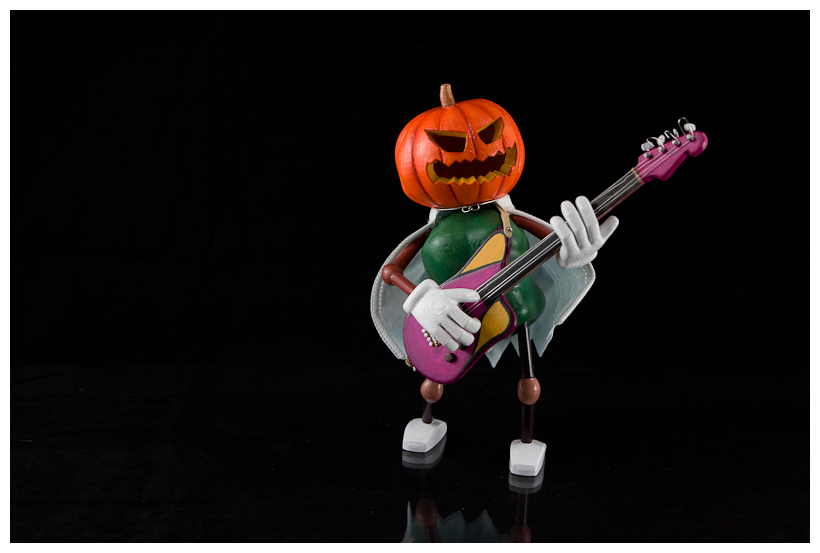
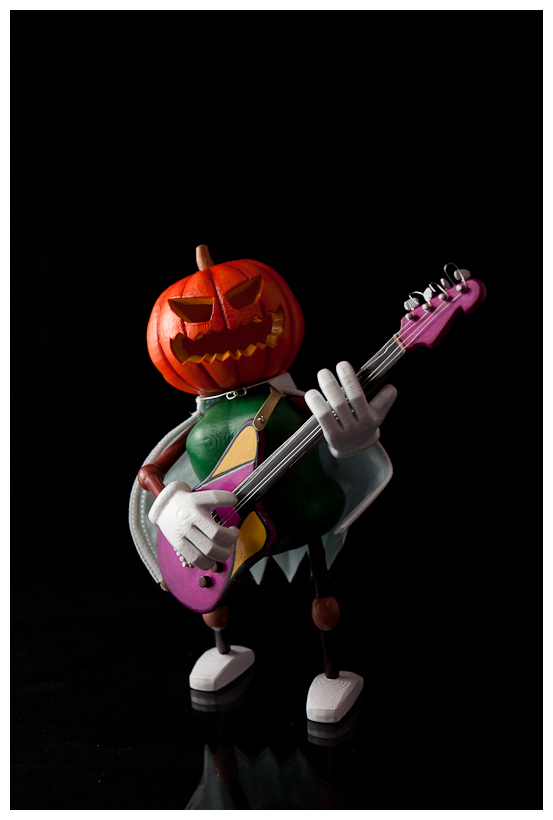
5. Completed Model
Of no doubt, it was a quite fun halloween project. Hope to make some more models later using 3D printer again.
Here are some photos of Mr. P.