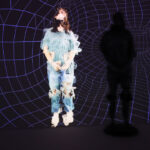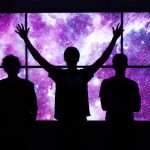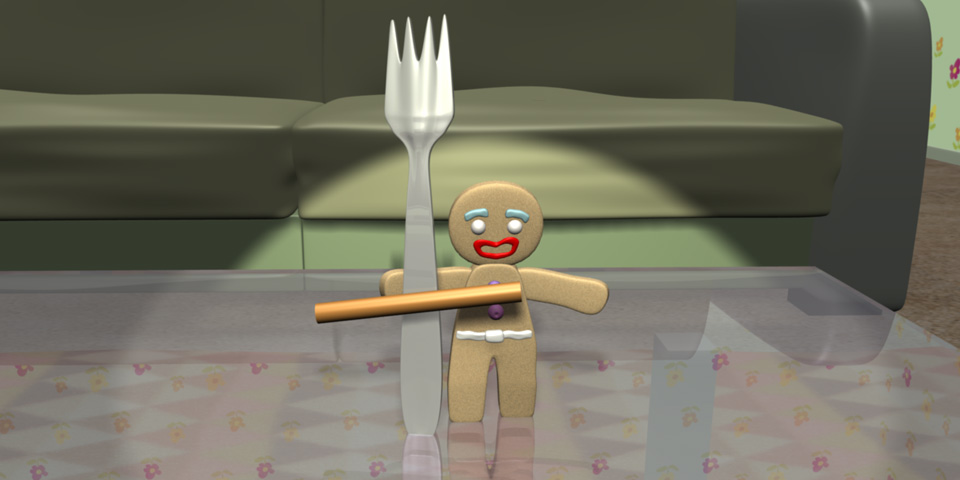
“Shall We Dance?” is a short computer animation inspired by the concept of the living toy after hours from Toy Story and Far Far Away Idol Contest scene from Shrek2 (a little gingerbread character’s dancing with a fairy).
In this reference story, several of non-human character compete to win “Idol”. Famous gingerbread character dances with a fairy. My story is … One gingerbread, like Gingy, mysteriously animated by itself and wake up from the helpless dish on the tea table. And… Watching the Idol contest and trying to mimic Gingy, “Dancing”. Dance with whom? The story goes on…
I modeled and shaded whole scene and character using open source Blender tool. I used keyframe skeleton animation and shapekey (similar to blendshape in Maya) for facial expression in the same tool.
* Note
This page includes my personal experience of Blender software to create “Shall We Dance?” project. All comments are not thoroughly verified. Therefore, there could be a much better way or it could be simply “do not know” case.
1. Storyboard
[tabs slidertype=”images” auto=”no”]
[imagetab width=”960″ height=”658″] http://sjameslee.com/wp-content/uploads/2013/01/scene_01.jpg [/imagetab]
[imagetab width=”960″ height=”658″] http://sjameslee.com/wp-content/uploads/2013/01/scene_02.jpg [/imagetab]
[imagetab width=”960″ height=”658″] http://sjameslee.com/wp-content/uploads/2013/01/scene_03.jpg [/imagetab]
[imagetab width=”960″ height=”658″] http://sjameslee.com/wp-content/uploads/2013/01/scene_04.jpg [/imagetab]
[imagetab width=”960″ height=”658″] http://sjameslee.com/wp-content/uploads/2013/01/scene_05.jpg [/imagetab]
[imagetab width=”960″ height=”658″] http://sjameslee.com/wp-content/uploads/2013/01/scene_06.jpg [/imagetab]
[imagetab width=”960″ height=”658″] http://sjameslee.com/wp-content/uploads/2013/01/scene_07.jpg [/imagetab]
[imagetab width=”960″ height=”658″] http://sjameslee.com/wp-content/uploads/2013/01/scene_08.jpg [/imagetab]
[imagetab width=”960″ height=”658″] http://sjameslee.com/wp-content/uploads/2013/01/scene_09.jpg [/imagetab]
[/tabs]
2. Final Animation Video
60 seconds computer generated animation (cover and credit not included in this duration)
3. Modeling
The whole process of modeling part was done mainly by Blender primitive (cube, sphere, cylinder) and extrude operation with mirror modifier. Many of the mesh objects also use subsurface modified to reduce the complexity of controlling mesh elements (vertex, face, edge). This is the greatest way of effective modeling. Most modern CG tools support this more or less.
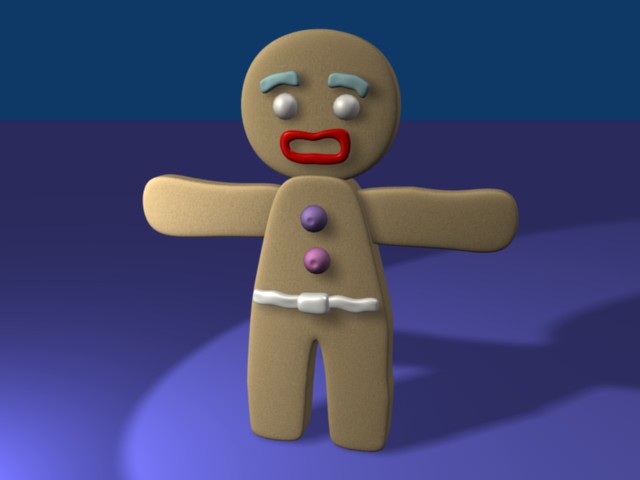
– Character: Gingerbread Man (Modeling & Rigging)
As explained in gingerbread tutorial, it is started with cube object and modified further in detail. One important aspect of character design was to make it anti-symmetric. All part of body changed after mirror operation so that it looks slightly different from left to right. (This may be not too obvious at a glance).
The basic shape of body thickened compared to tutorial model to give more sense of 3D volume. The edge of the outline designed not too flat by adding another control vertex to prevent too smooth round shape of the subsurface. (below left: body made from a tutorial, right two: shape changes)
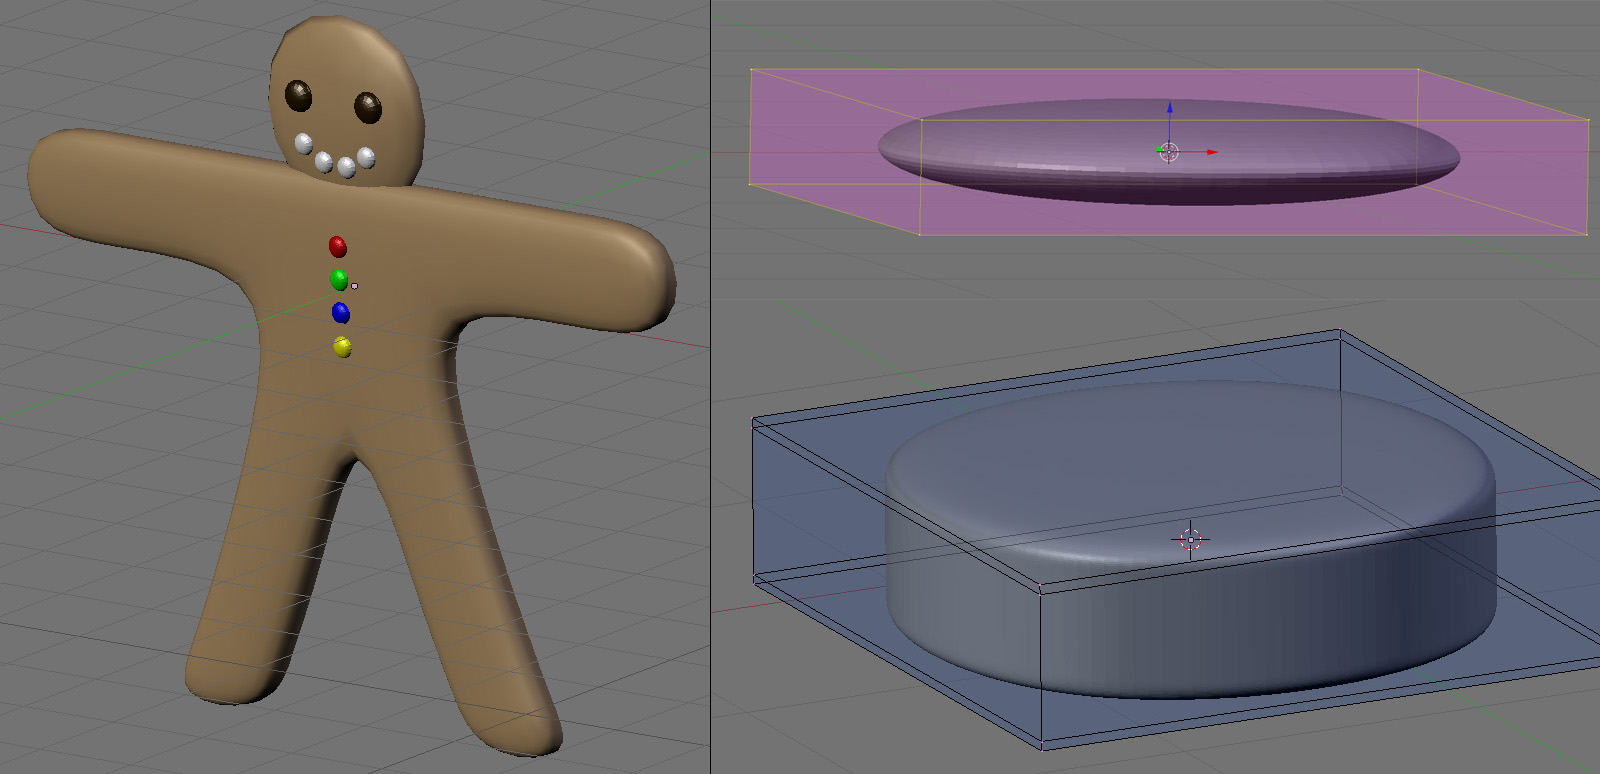
Then, finished the rest of body part with eyes, eyebrows, lip and waist belt.

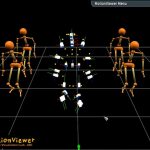
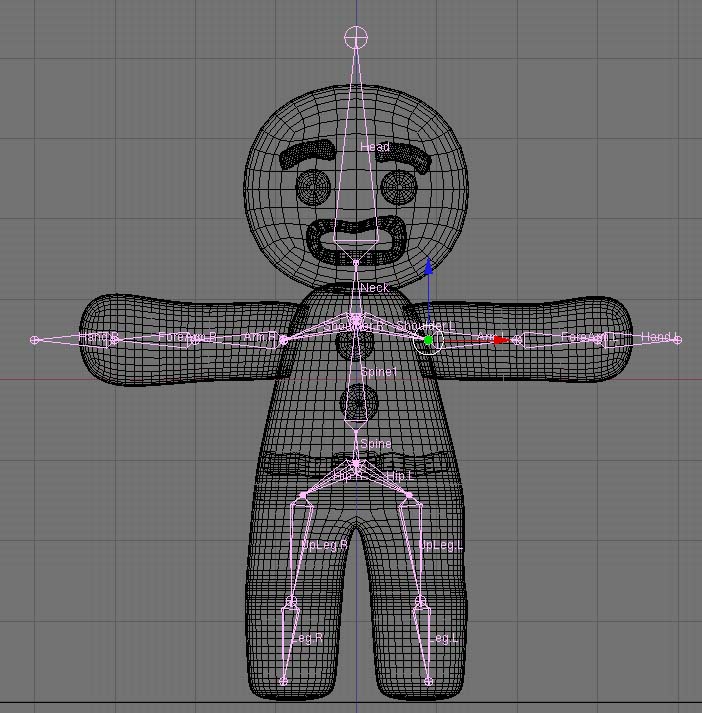
Construction of character armature was not easy at the beginning time. The pivot point of the armature object is based on the first bone’s root. I started with arm bone and this cause the pivot offset and not good to transform the whole body especially the case of rotation.
I made dummy empty object in the center of the armature and parent armature to this empty so that I can better control rotation and translation later on. Not sure this is a good solution or not.
To get the better animation, more bones added (upper arm, arm, upper leg, leg, neck… see below figure)
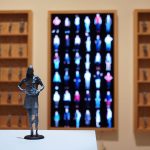
– Simple Room Environments
Since I am not making whole complex environments, space is limited to a small room with a few types of furniture. All of the components made by simple plane with a texture on it.
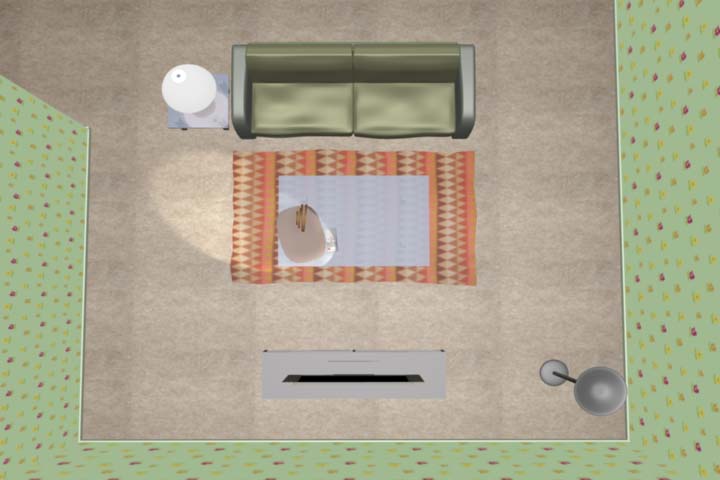
– Furniture (Couch, Tea Table, Lamps…)
I spent some time to make couch but it is not seen often in the final animation. The surface of the Couch manually changed not to look like a simple box.
A tea table is an important object since it is the main stage of “Shall We Dance?” project. Even though it is made of a cube, reflection/refraction makes it look good with a blending of floor material. Originally designed to create really glass like shading but it looked too complex with a bunch of reflection. So, reflection effect slightly is reduced by setting lower ray mirror and higher frensel value in Ray Mirror property.

4. Light & Material
Light & Material is not an easy topic in CG. It needs lots of experiments to find the best parameters to achieve the right color and feeling.
– Light
Due to the rendering time in the final stage, only a few lights are added in the scene. One main light, one character spotlight, and two lamps for floor light and table one (these are model). Character spotlight tracks gingerbread man all the time to brighten its color and generate shadow (soft buffered shadow used). The light inside the floor lamp turns out to be not so useful since it does not appear long enough time in the final animation.
– Material
Most of the objects use pretty basic default material with different color and emissive value. The emissive value used to brighten some surfaces instead of using expensive accurate radiosity rendering option. Important material was tabletop reflection/refraction. Blender manual gave a good starting point and after several rendering tests, final parameters were decided.
Bump/Normal Map… I tried to use a bump map for floor material (two pictured carpet) and gingerbread body. Blender manual and tutorial does not give proper result. It just adds noise to the flat surface. It looks flat, no bump. It will be really nice to have a bump on gingerbread man’s body.
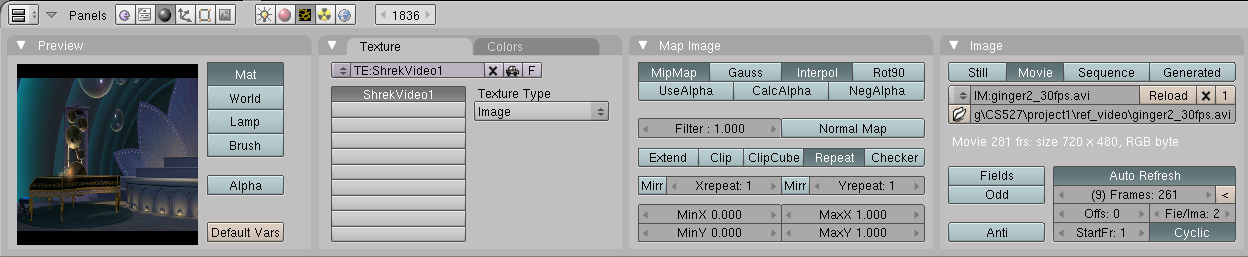
– Texture (Image and Movie)
Floor carpet and the wall has a texture applied to them. Floor texture is a photo of my rug and a bit touched in photoshop to make better color. One thing useful here… When a photo is not aligned nicely (if there is a pattern, alignment is important), Photoshop has a nice tool to shrink/stretch/etc seamlessly. It is Liquify under the filter menu. I used it to modify the second rug texture. (below left: original photo, right: modified texture. better aligned)

The last texture I used is a video texture. I applied it to the TV screen to show video footage into the scene. One flaw of this feature is that there is no way one can control frames of the video sequence. Either play once or repeat. Can set offset or segment but cannot control when it should start playback and stop. Therefore I have to move this TV scene as separate on so that animation begins from the first frame to end of video playback.
5. Animation
– Character Facial Expression (RVK Relative Vetex Key or Shape Key)
In addition to skeleton animation main character has shape key animation. In this method, mesh replicate multiple sets of vertices and interpolate in-between to generate the animation. Compared to bone animation, this shape key approach could give smoother and detailed animation. Generally good for facial expression. In my project, gingerbread man character’s eye, eyebrow, and lip have shape key. Below images show several sets of these key. (reference: blender shpaekey manual, http://wiki.blender.org/index.php/Manual/Shape_Keys)

– Armature Pose Buffer
Copy one pose and paste it onto other frame. This tool was perfect to make cyclic animation like walking.
– Action Editor
Blender Action Editor is designed for NLA (Non-Linear-Animation) similar to layered animation or animation tracks in other packages. During “Shall We Dance?” project, I used action editor extensively even though it was not intended to migrate to NLA.

– Rotation of obejct or armature
Without typing numbers on transform window, direct manipulation of rotation was not easy. All transformation based on global coordinate (not 100% sure). In many case, object local coordinate is very useful to animate it.
– Can change key interpolation curve?
Blender seems to use spline or bezier curve to interpolate two key values. Like other common CG tool, I was expecting the way to change its interpolator curve based on a designer’s decision. Unfortunately could not find how to do this. Blender’s IPO curve editor does not provide move key values, cut the connection before and after key value, change curve type to linear/spline/etc. I did not spend much time to figure it out this time, so there may be a way to do this or alternative means.
(Oops!!! My Bad. There is a nice manual for this. I just missed it. This would give much better control and fine tune of animation. http://wiki.blender.org/index.php/Manual/Ipo_Curves_and_Keyframes)
6. Rendering
There were lots of big & small trouble during this project using Blender but rendering is far more critical at the end.
“Shall We Dance” has total 1827 frames (60.9 secs @ 30 fps). Since there are some objects that need inevitable raytracing calculation to generate proper shadow/reflection/refraction, rendering takes tons of time.
Most of the frames took about 2 to 4 minutes per frames in 720×480 resolution on a decent machine. This sums up total 53 to 100 hours to finish final rendering sequences. This cannot be done on a single machine within limited project time.
Rendering frames were distributed to 5 machines. (3 core 2 duo, 1 old xeon, 1 old powerpc) The total estimate of rendering is about 20 hours with all those systems running simultaneously. One difficulty I had with this distributed rendering was that Blender does not have batch rendering feature. If I need to render not continous frames on one machine, I had to start each job after finishing the previous sequence of frames. Any way to batch this?
Initially, I estimated one minute per frame with various frame test on a dedicated system but suddenly the scene requires much more time for the final job. I had to reduce some details of the model (number of subdivision on subsurface).
One consideration might be … to use optimized Blender build. (SSE2, SSE3, and 3DNow! optimized blender. Rendering times are 30% faster. refer to http://wiki.blender.org/index.php/Manual/Rendering and http://www.graphicall.org/builds/index.php)
7. Some Lessons & Missing Parts
– Better Estimate of Rendering time
To finish the job on time, one must count for final rendering time carefully. Sample rendering from various scene frames helps a lot. If the only simple scene is considered to estimate total rendering time, you will run out of the schedule. This is really frustrating. “You simply cannot finish it by the due!!!”
– Rough Sketch of Scene composition & animation
After finishing storyboard or whatever idea sketch, it was very useful to make a quick draft of motion of all objects in the scene. This gives an opportunity of adjusting camera walk, the speed of motion, timings and etc. Once start with real model and animation, it is relatively more difficult to change these things afterward. A common concept of LOD can be applied here in the same way and “Divide and Conquer”.
– More realistic motion (animation)
This is the most important part of the job. In addition to the realism of visual quality, the realism of movement can increase the overall quality of animation enormously. In this work, several issues still remain. Realistic walking, dancing, the motion of rigid body object (dancing partner, “fork”)
A rhythm of motion. Animation of each object in the scene should have a sense of rhythm. Fast / Vivid / Neutral / Slow / Pause etc. In my project, the main character’s rhythm is not well refined, I think. Some lack of pausing between important changes in emotion and scene. It would be much better if I make nonlinear motion & storytelling here. Sometimes fast, sometimes really slow and even pause a while.
– Would I like to use Blender Ever Again?
I was not so willing to use Blender before due to its strange user interface. I generally used to many of commercial CG package and know that those have a kind of common sense in GUI design. So, it is not so difficult to learn a new one. But Blender is so unique. Its early learning curve is really stiff. Anyway, with this first animation project, I could also find many good aspects of Blender. Its feature and result are pretty decent and I got used to it. Therefore, I may use Blender again later if necessary. But still not the first choice.
8. References & Credits
– Blender Wiki Manual (http://wiki.blender.org/index.php/Manual)
This manual covers many of features in Blender such as modeling, light, material, animation, and rendering.
– Introduction to character animation, Blender Tutorial, http://wiki.blender.org/index.php/BSoD/Introduction_to_Character_Animation
– Your first animation in 30 plus 30 minutes, Blender Tutorial, http://wiki.blender.org/index.php/Manual/PartI/Your_First_Animation_in_30_plus_30_Minutes_Part_I
– Dreamworks “Shrek2”: ‘Far Far Away Idol’ in supplemental footage